Wait a minute, no-touch website optimization? How on earth can you optimize your website without touching it? That’s absurd. Insane even. Have you gone stark raving mad, Oli?
Who me? Never! Or at least, not all the way crazy. I’m talking about ways that you can experiment, learn, and change behavior simply by using page and UI elements like Popups and Sticky Bars. An approach I call no-touch CRO (conversion optimization).
What is No-Touch CRO?
Kinda like the title suggests, no-touch CRO is about uncovering, exploiting, and maximizing the conversion opportunities that exist on your website. It’s all about velocity, getting results, and learning quickly and easily so you can make informed updates and optimizations to your website backed by data.
Here’s how it works in a nutshell. You install the Unbounce script on your site once, and then you have access to creating experiences on every page, without touching any code or design on the site.
Think of it as a layer of abstraction that exists above your site. Like literally.
“Are you doing that product awareness thing again, Oli?” Yup. I most definitely am. But only because I think the 11 ideas below are badass, and it’s how I like to work.
(Skip to the 11 website optimization ideas).
Navigating the Politics of Website Optimization
The reason I like this approach is because the politics of website development, design, and optimization are a complicated and slow-moving pain in everyone’s ass. The number of stakeholders, sign-offs, reviews, and revisions that are necessary to get a change implemented are always underestimated. Not to mention budgets, different departmental priorities and needs, and of course time. It’s basically a giant cluster that needs to be navigated proactively.
Which is why, if you can come to the table with some evidence that your ideas can affect positive change, those same naysaying stakeholders will become advocates for your work.
Now, I’m not suggesting the first thing you do is to start hammering your pricing page visitors with popups. You have to be smarter than that. Starting small, on low-traffic pages, and using techniques that are legitimately useful for your visitors, and provide as much evidence and learning as possible. The more successes you can show, the greater the bounds of your website optimization freedom will be in the future.
I’m going to share 11 ideas for you to get started with no-touch website optimization using popups and sticky bars, but first, you need to get your web developer to install the script on the website.
Your developer may have some questions such as: How big is the script? Which pages does it need to be added to? We interviewed two of our web developers at Unbounce to understand these concerns, and it was enlightening to hear about their process, and what they check when considering adding another script to the site.
We found that it’s typically a 1-2 day turnaround to get a new script installed, based on the research they need to do regarding page speed and bug testing etc. But one of the most interesting parts to me was simply the desire for the web developer to be included in the process. They didn’t want marketers installing it on the site themselves because it’s a serious concern that needs to be handled properly.
A big positive insight was that the amount of features available in the Unbounce platform (for triggers, targeting, and timing) allows significantly more functionality, interaction, and marketing campaign content without any requests of the developer’s time – making it a big win-win overall.
Just make sure you involve your developers.
If you have Google Tag Manager set up on your site, it’s even easier to get the Unbounce script added. Send this post about adding the Unbounce script using GTM to your web developer now.
11 No-Touch Conversion Optimization Opportunities You Can Take Advantage of on Your Website
Alright! Time to start optimizing your website without touching your website. Here are eleven creative ways to increase the number of conversions, and insights you get from your website.
#1: What on earth are you clicking on?
If you are a frequent observer of heat maps you’ll have no doubt seen big splotches where many people are clicking a page element (word, image etc.) when the element isn’t even clickable.
There can be several reasons for this:
- It’s just what people do when they read
- They are expecting something to happen
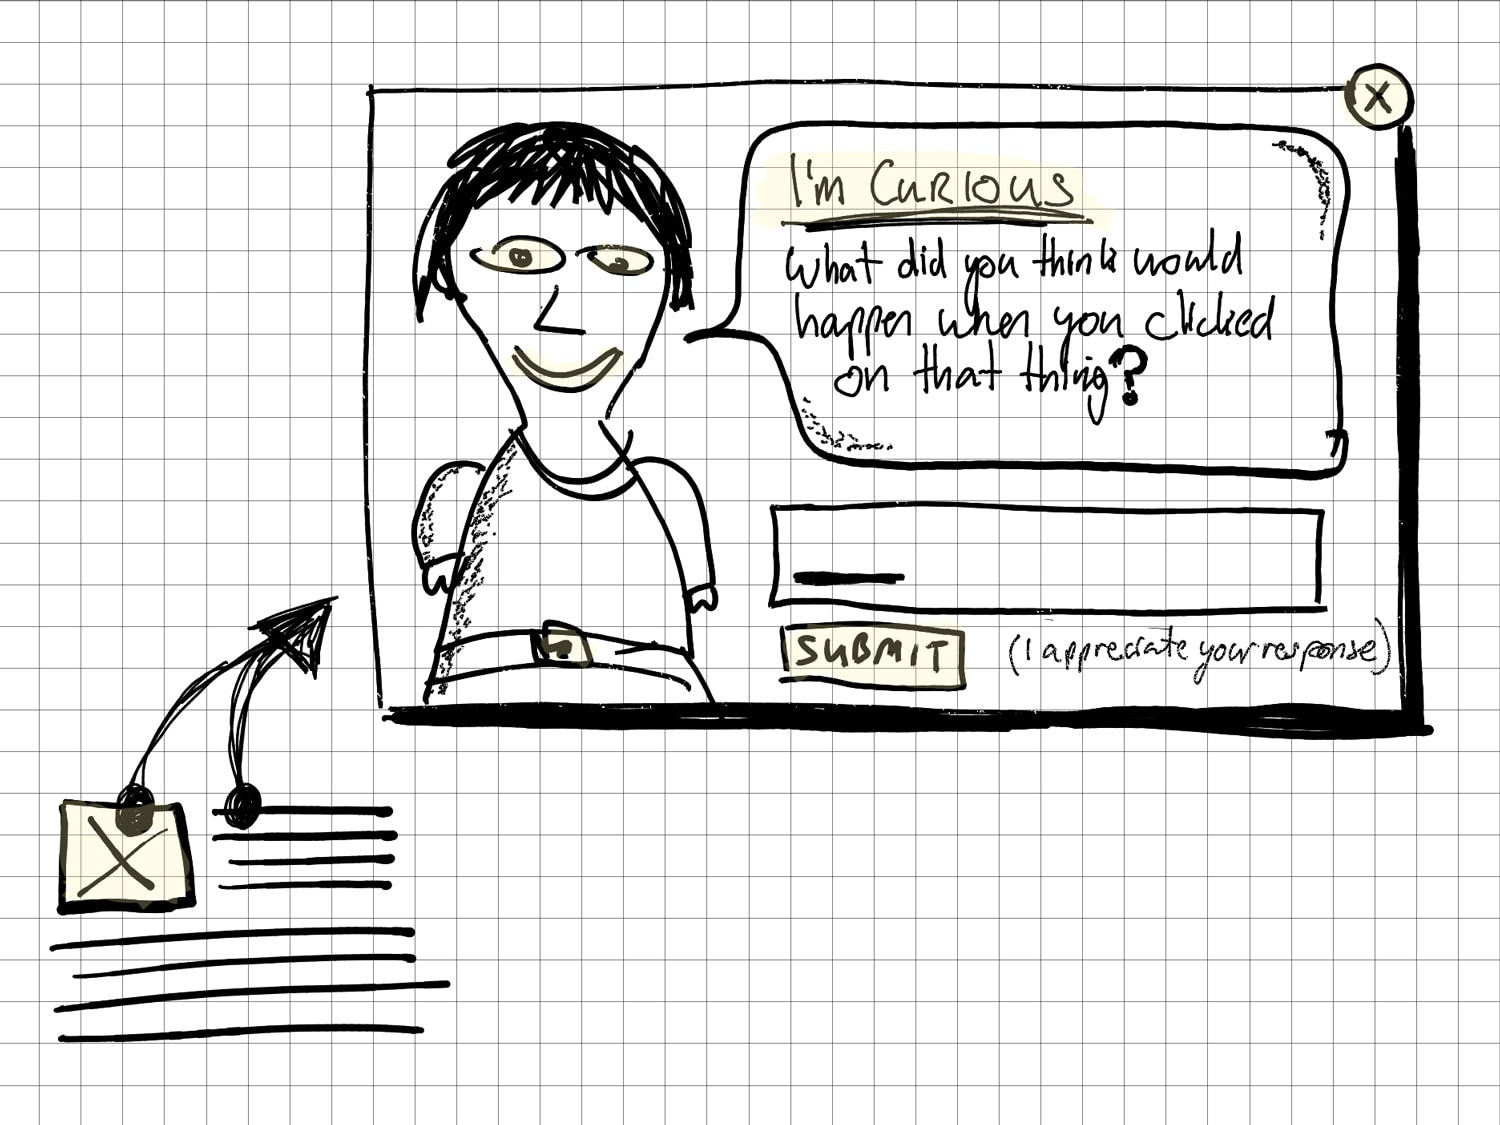
In the case of option B, there’s an opportunity to learn why they are exhibiting this behavior and ask them what they expected to happen.
You can do this by using the click trigger to launch a popup with a simple open-ended question such as “What did you expect to happen when you clicked that?” or “What are you looking for?”.
Conversion Implications
The responses from these research questions could inform you as to a missing part of the experience which you can then consider adding to the website, either directly, or after an A/B test of some kind.
An Unbounce Example
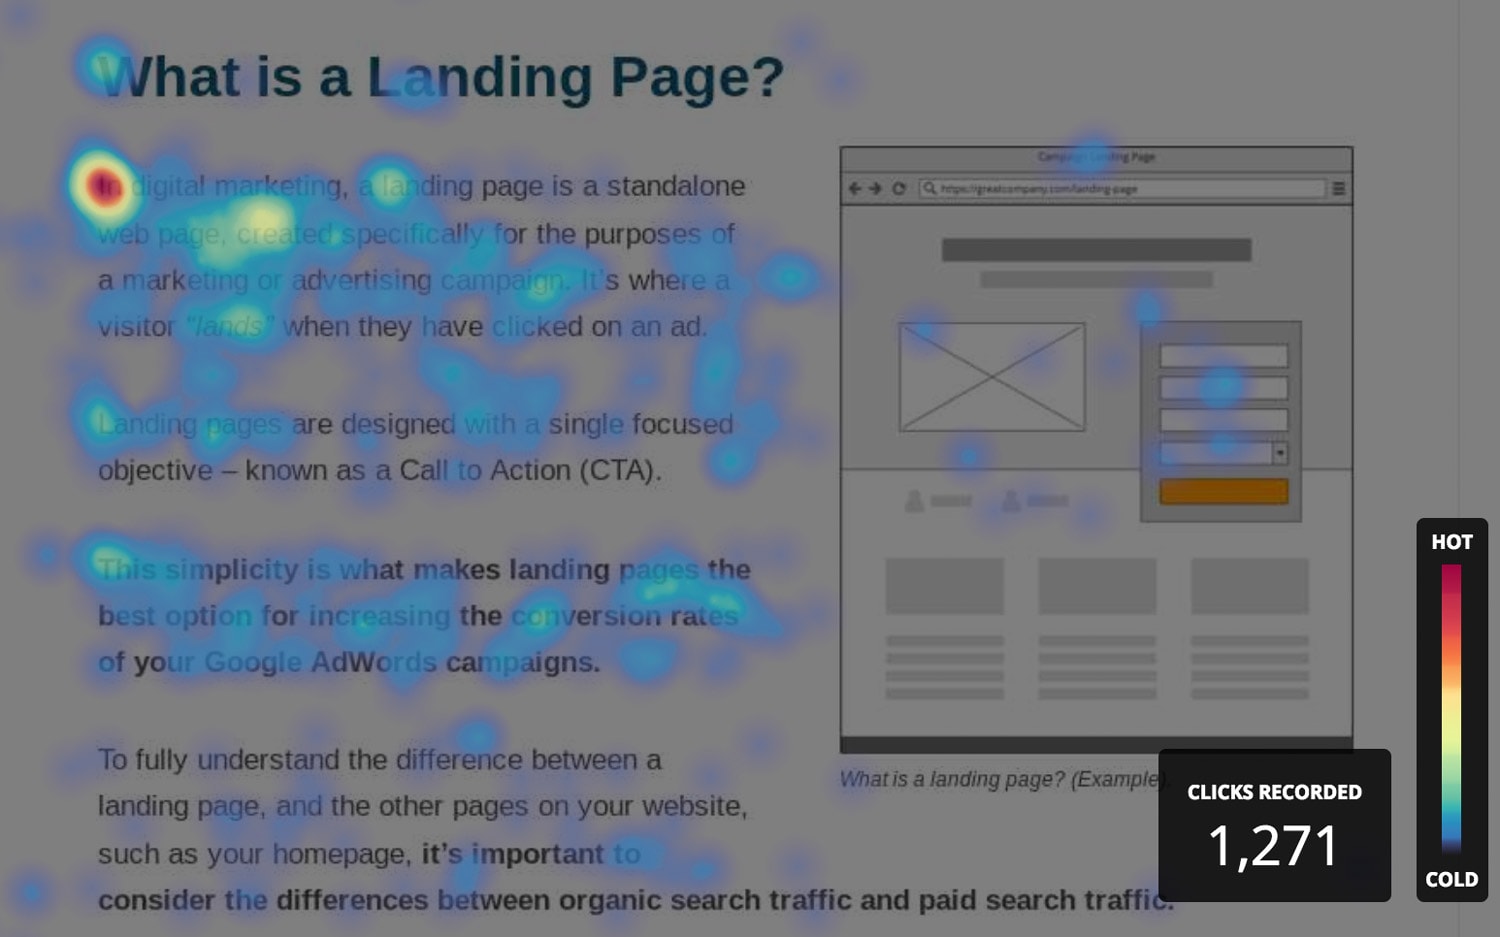
When I was researching behavior on our “What is a Landing Page?” page, I noticed interesting behavior on the first paragraph, where the first word was really strongly highlighted. I had two theories about this:
- It’s just a thing people do when they start reading.
- People were clicking on the first word and then dragging their mouse to the end of the first or second paragraph to copy the text. Because the page is a very well written and simple definition of what a landing page is, I hypothesized that people doing research who needed a definition to include in their content were copying the definition.To confirm this I watched some session recordings and observed someone doing this. I also searched Google for my newly written definition and found over twenty sites had done exactly that. Inbound links FTW.
#2: Create a Custom 404
Wouldn’t you like to know what people are thinking when they’re on your 404 page? If you dig into your analytics you’ll be able to figure out where they came from, but where should they go next?
By using a popup on your 404, you can take advantage of several conversion opportunities:
Option A: Research & Redirect
If you can establish where people are coming from (in order words, where the broken link is), you can use the referrer URL targeting in Unbounce to create a custom experience for them.
If the broken link is on your own site, you can get that fixed, or a 301 redirect put in place to a relevant page and if the broken link is on someone else’s site you can reach out to them for an update.
However, both of those options take time and resources to accomplish. You should put them in motion regardless, but in the meantime, there’s plenty you can do to learn and optimize.
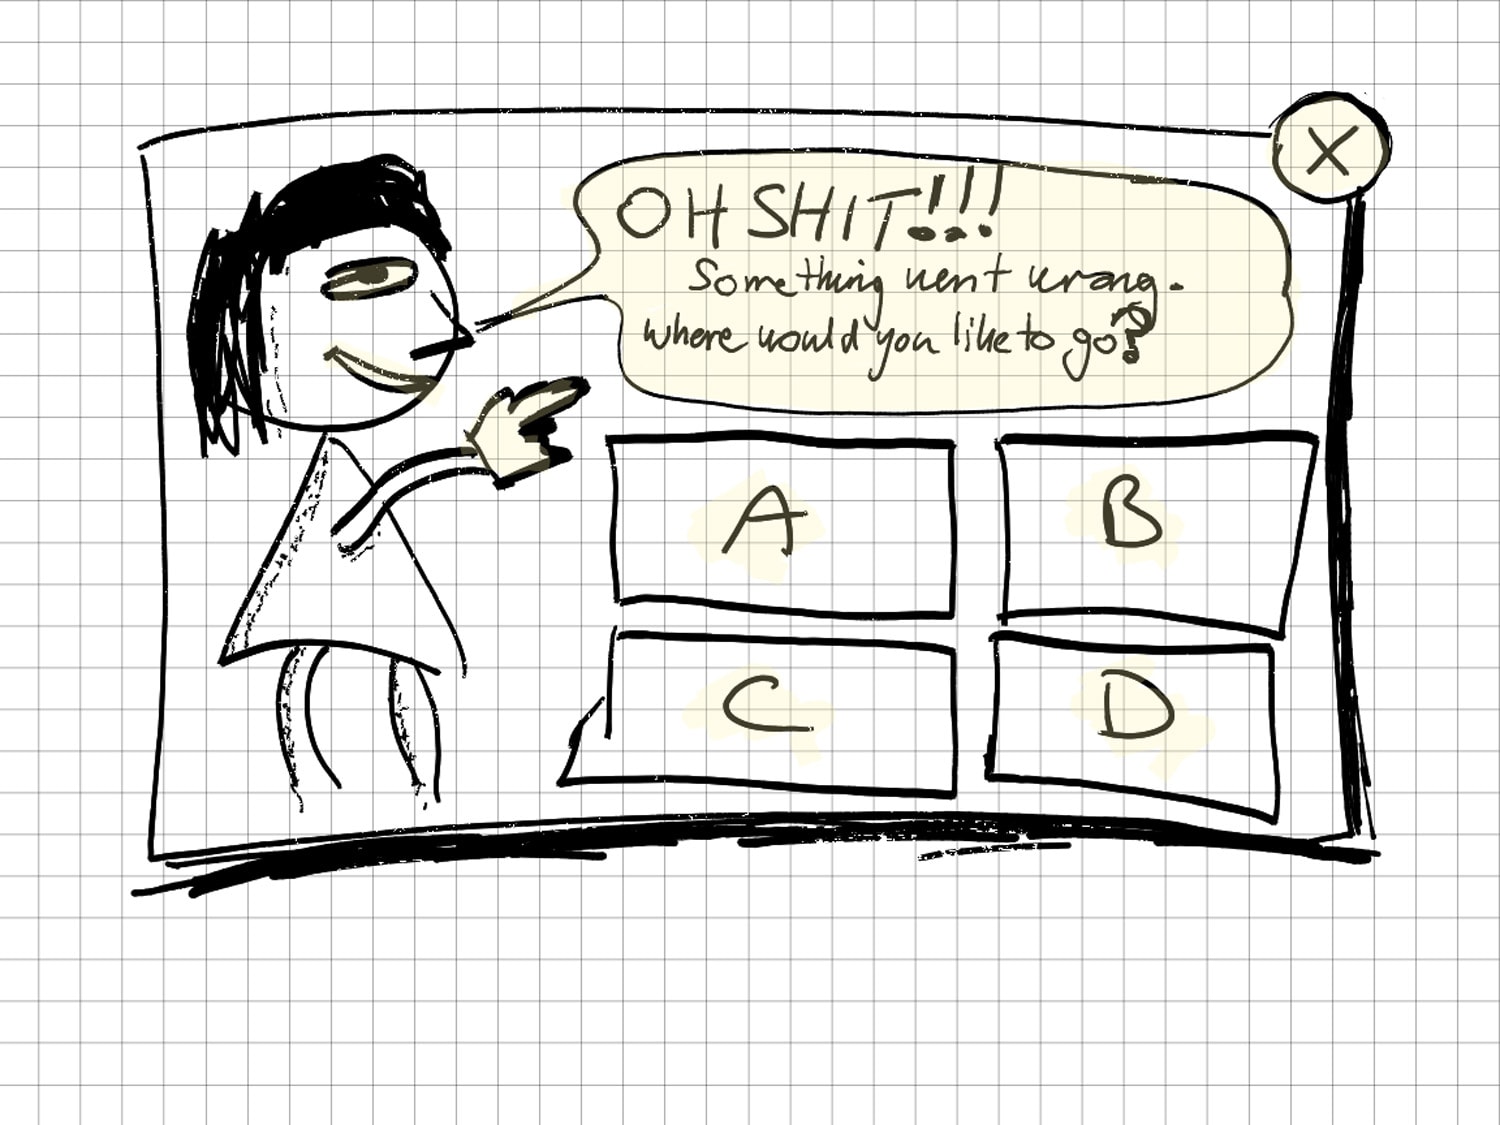
This is a great place to experiment with a Choose Your Own Adventure (CYOA) experience to see what the preferred next step is. If you can show a pattern of next step desire here you’re ready to make a more permanent 301 redirect to the popular choice.
An open-ended question like “What were you looking for?” coupled with a few large buttons that redirect people to some of your critical path conversion pages.
Option B: Replace
Something you might not know is that if you use the Unbounce Wordpress plugin for your landing pages, there’s a way to replace a broken link with a landing page.
When using the Wordpress plugin, any URL you set up on your domain in Unbounce will assume dominance over an existing page. Now you most likely don’t want to do this with a legit page that’s working. But for a broken link you could publish a landing page using the very same URL to present an experience that you are in full control of – no developers required.
Warning! Don’t simply go overriding pages all over your website (unless you own it fully). Let your web and marketing coworkers know what you’re doing.
#3: The Login Hijack
I introduced The Login Hijack in my 5 Legitimately Cool Use Cases for Website Popups You’ve Never Considered post. The concept is to create an experience based on the information that you (probably) have a large % of visitors (customers in this case) only showing up to click the login link.
Note: You need to drop a cookie on your login page to identify customers, then you can use the cookie targeting in Unbounce to show the popup when they return next time.
This is a perfect place to insert some product marketing content. Here are two ideas:
Idea #1
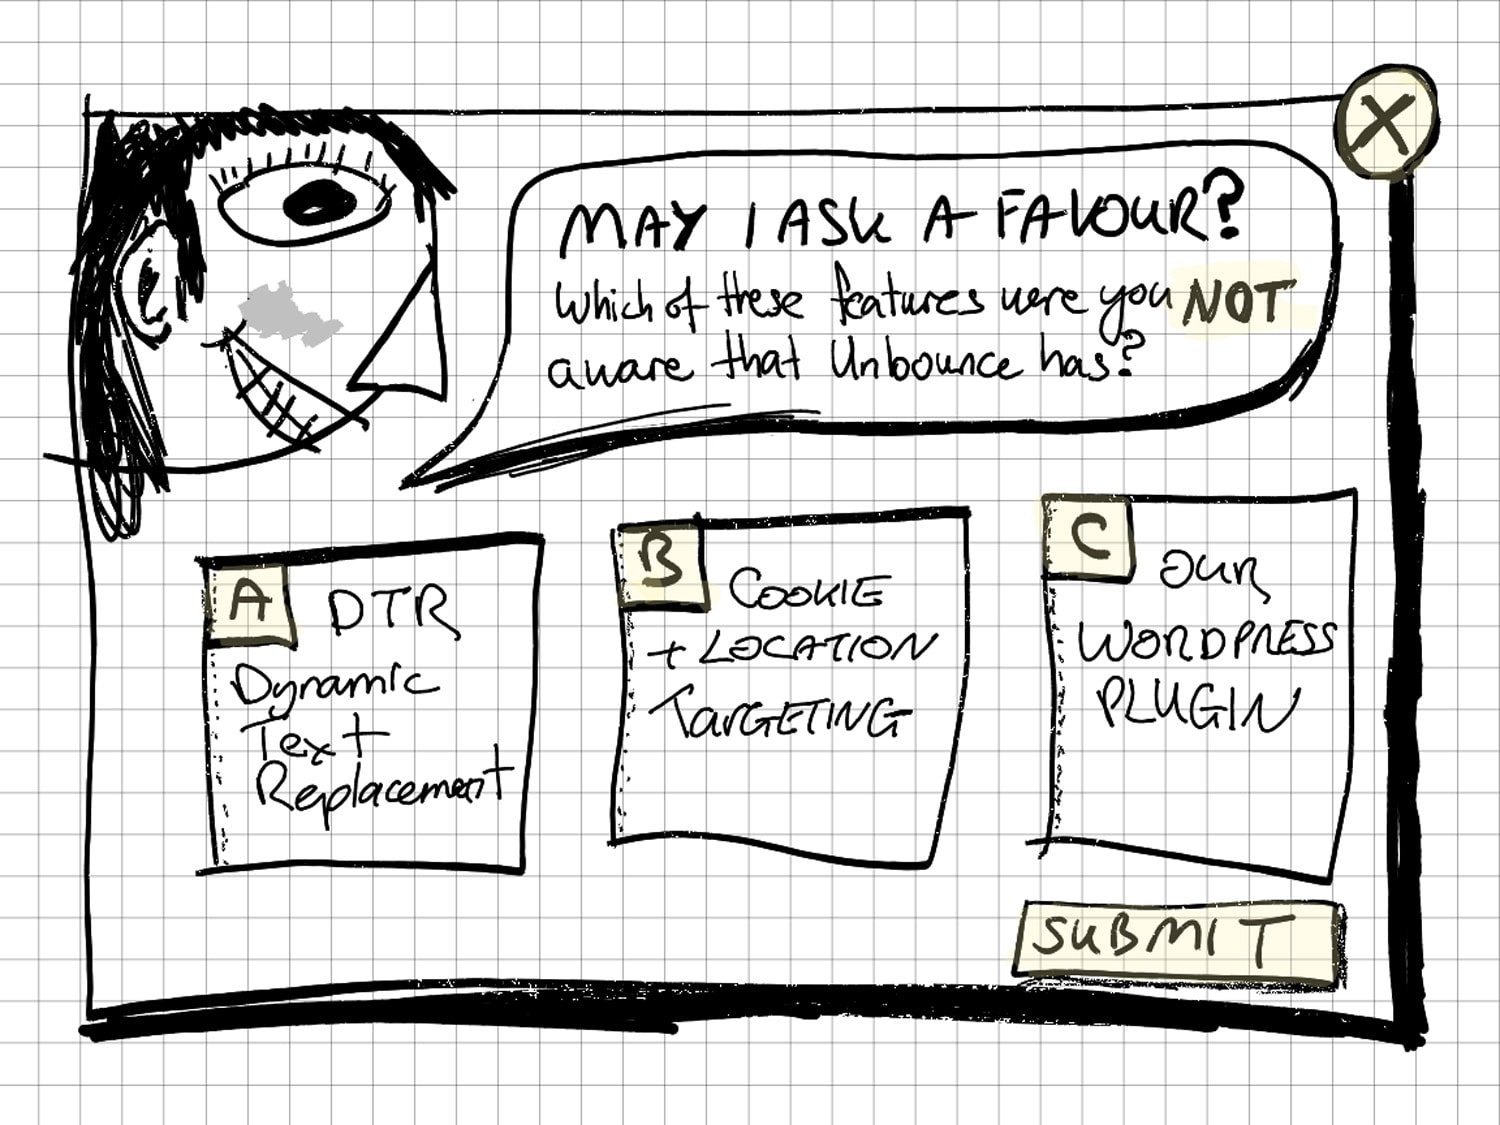
Run a “did you know?” survey to measure new feature awareness. This could take the form of a series of large buttons with product or feature names on them, and a request to “Click all of the features you were not aware of.” The heatmap on this could be fascinating. Don’t forget to also include a login link so customers don’t have to click to close the popup before proceeding.
You could also include a login redirect after the question is answered to prevent the need for an extra click.
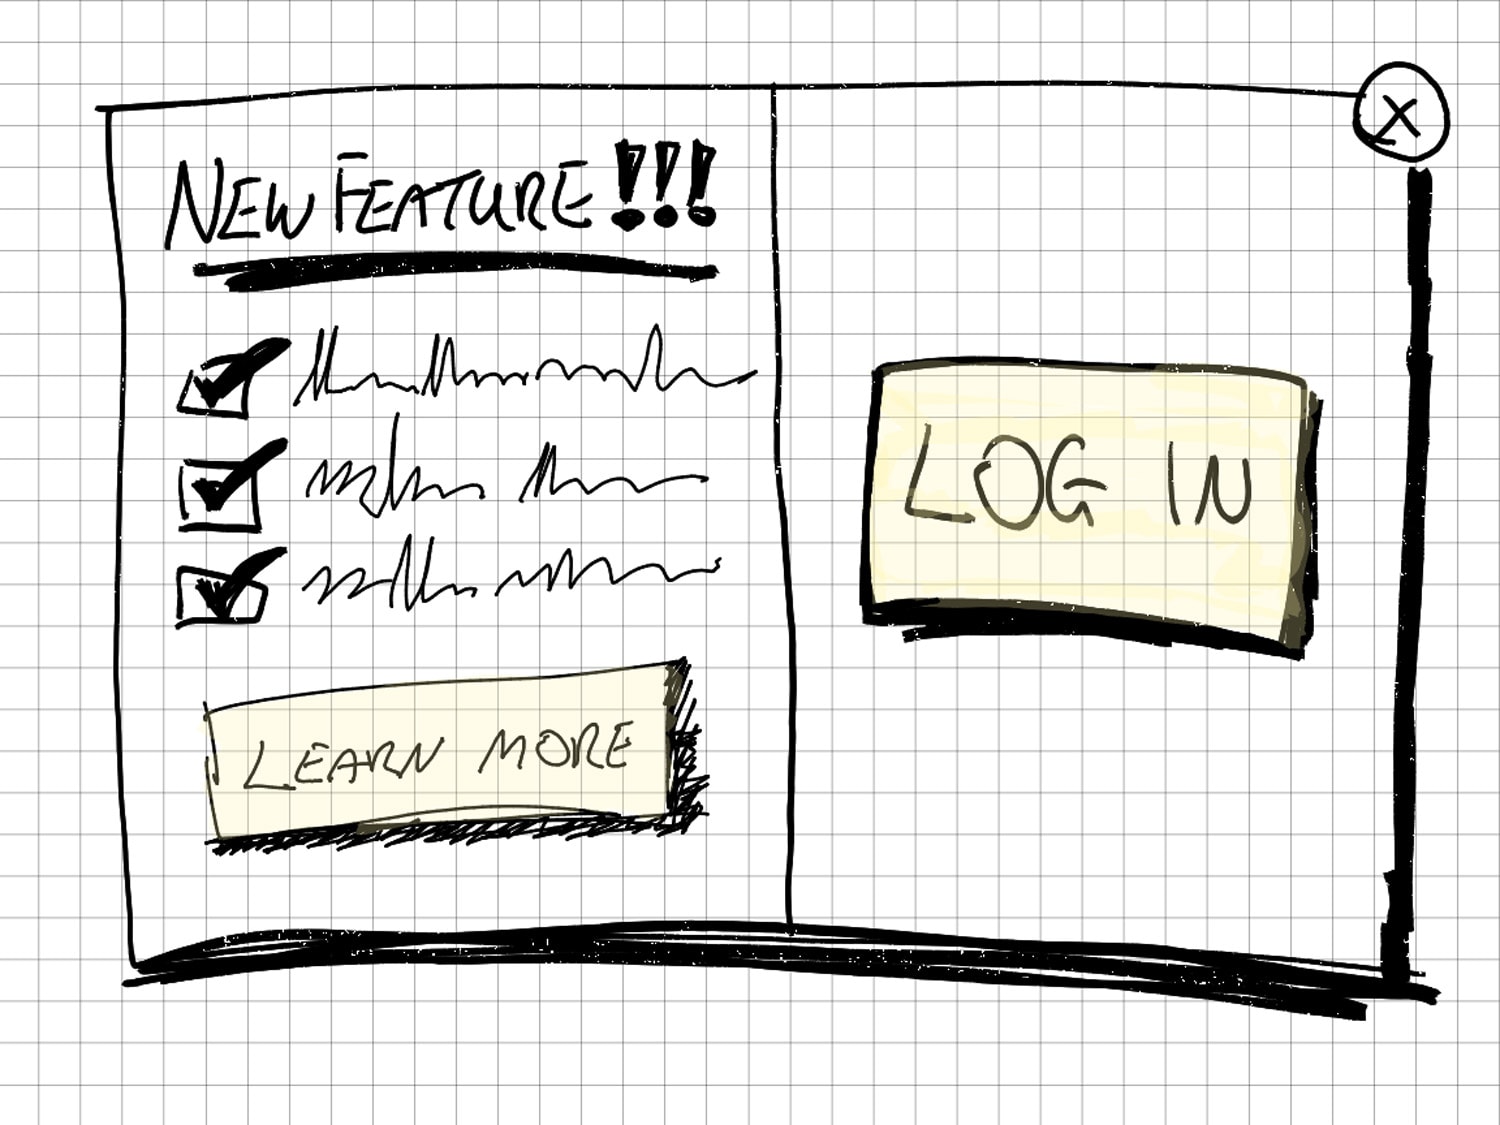
Idea #2
Present a popup with a 50-50 vertical split. The left side can present information about a new product or feature with a “Learn More” button, and the right half can provide a large login button. Not only does this allow you to get product messaging in front of your customers, it also makes the login link/button bigger that it would have been.
#4: Advanced Video Interactions
If you have any videos on your website you probably have a call to action at the end. This is great. Until you look at the engagement data and realize that 50% of people never get to the end.
You can get around this problem with a very cool interaction model that Unbounce Noah Matsell built.
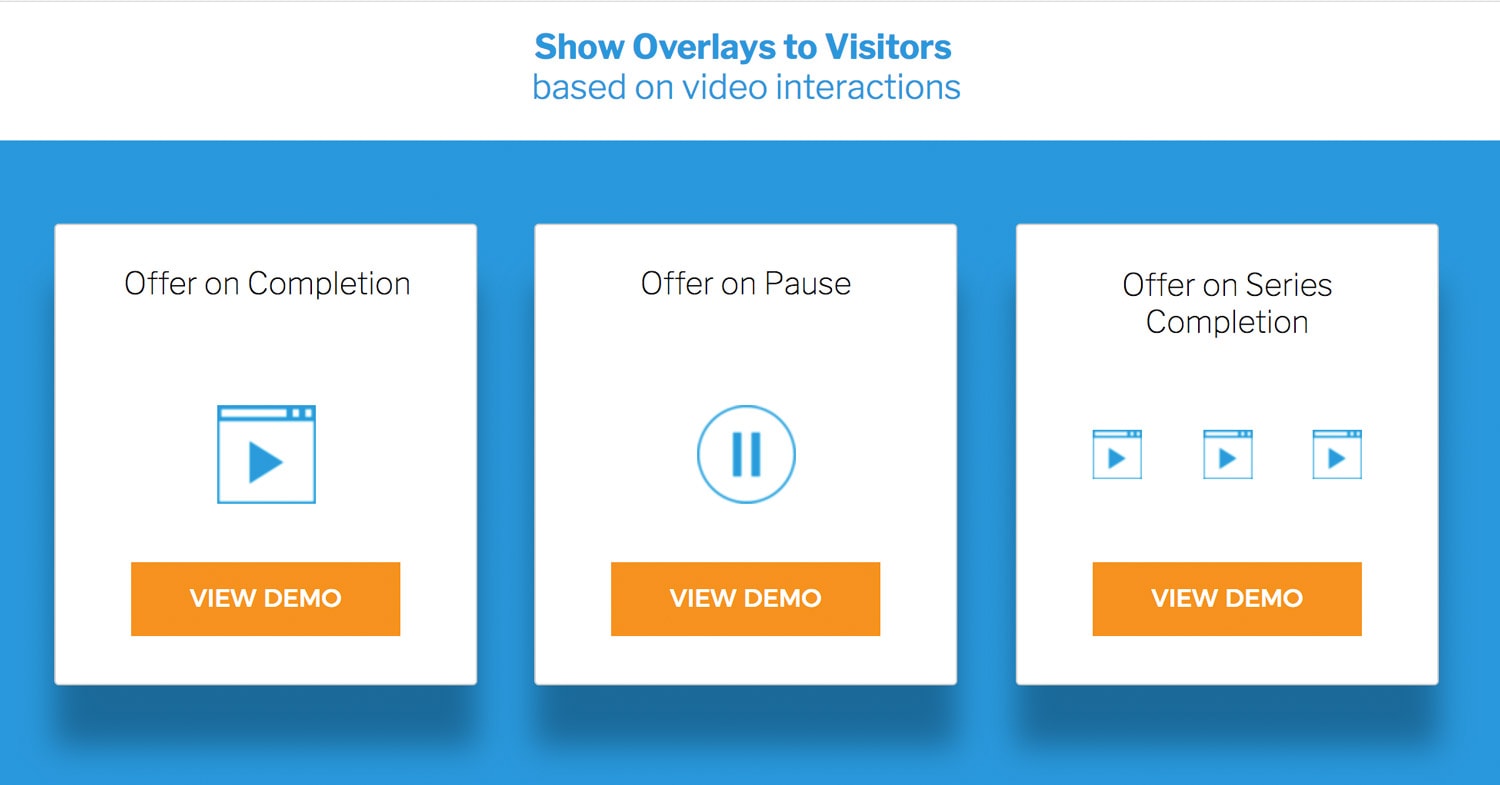
Using this method (requires a little Javascript), you can present your visitors/customers with a popup based on 3 different levels of interaction.
On completion
When the video has been watched to the end. Note that a popup presents a significantly large area to present an offer than the typical text/button CTA that appears in the middle of the video window. You can even instruct people to watch the whole video to get a special offer.
Here’s the Javascript
<script src="https://player.vimeo.com/api/player.js"></script>

<script>
 var offerVideo = $('.lp-pom-video iframe')[0];
 //var vidURL = $('.lp-pom-video iframe').attr('src');
 //$('.lp-pom-video iframe').attr('src', vidURL + '?enablejsapi=1');


    var player = new Vimeo.Player(offerVideo);
    player.on('ended', function() {
     window.location.hash = "completed";
      $('.lp-pom-video').html('<h1 style="color: #7ac142; left: 321px; top:30px;text-align:center;font-family: Montserrat;font-size:48px;">Thanks for watching!</h1><svg class="checkmark" xmlns="http://www.w3.org/2000/svg" viewBox="0 0 52 52"><circle class="checkmark__circle" cx="26" cy="26" r="25" fill="none"/><path class="checkmark__check" fill="none" d="M14.1 27.2l7.1 7.2 16.7-16.8"/></svg>');
    });

</script>
Here’s the CSS
<style>
.wrapper{
  transition: all 0.3s cubic-bezier(0.165, 0.84, 0.44, 1);
  left: 10%;
  perspective: 1000px;
  -webkit-perspective: 1000px;
  perspective-origin: 30% 70%;
}

.item:hover{
  cursor: pointer;
}

.item {
  box-shadow: 10px 20px 80px rgba(0,0,0,1);
  transition: all 0.3s cubic-bezier(0.165, 0.84, 0.44, 1);
  transform: translateX(0px);
}

.perspective{
  transition: all 0.3s cubic-bezier(0.165, 0.84, 0.44, 1);
  left: 50%;
  box-shadow: -10px 20px 80px rgba(0,0,0,0.5);
  transform: scale(0.45) rotateY(14deg) rotateX(2deg) rotate(0deg)  translateX(-75%) !important;
}

#lp-pom-text-452, #lp-pom-text-455, #lp-pom-text-456, #lp-pom-text-475, #lp-pom-text-476, #lp-pom-text-477 {
  box-shadow: 10px 20px 80px rgba(0,0,0,0.4);
}
.checkmark__circle {
  stroke-dasharray: 166;
  stroke-dashoffset: 166;
  stroke-width: 2;
  stroke-miterlimit: 10;
  stroke: #7ac142;
  fill: none;
  animation: stroke 0.6s cubic-bezier(0.65, 0, 0.45, 1) forwards;
}

.checkmark {
  width: 56px;
  height: 56px;
  border-radius: 50%;
  display: block;
  stroke-width: 2;
  stroke: #fff;
  stroke-miterlimit: 10;
  margin: 10% auto;
  box-shadow: inset 0px 0px 0px #7ac142;
  animation: fill .4s ease-in-out .4s forwards, scale .3s ease-in-out .9s both;
}

.checkmark__check {
  transform-origin: 50% 50%;
  stroke-dasharray: 48;
  stroke-dashoffset: 48;
  animation: stroke 0.3s cubic-bezier(0.65, 0, 0.45, 1) 0.8s forwards;
}

@keyframes stroke {
  100% {
    stroke-dashoffset: 0;
  }
}
@keyframes scale {
  0%, 100% {
    transform: none;
  }
  50% {
    transform: scale3d(1.1, 1.1, 1);
  }
}
@keyframes fill {
  100% {
    box-shadow: inset 0px 0px 0px 30px #7ac142;
  }
}
</style>
On pause
This idea ups the cool factor for me. You can present an offer if someone pauses the video. A great place to ask a question (“Why did you stop watching”), or to present your offer right away.
Here’s the Javascript
<script src="https://player.vimeo.com/api/player.js"></script>

<script>
 var offerVideo = $('.lp-pom-video iframe')[0];
 //var vidURL = $('.lp-pom-video iframe').attr('src');
 //$('.lp-pom-video iframe').attr('src', vidURL + '?enablejsapi=1');

    var player = new Vimeo.Player(offerVideo);
    player.on('pause', function() {
      window.location.hash = "paused";
    });
</script>
Here’s the CSS
<style>
.wrapper{
  transition: all 0.3s cubic-bezier(0.165, 0.84, 0.44, 1);
  left: 10%;
  perspective: 1000px;
  -webkit-perspective: 1000px;
  perspective-origin: 30% 70%;
}

.item:hover{
  cursor: pointer;
}

.item {
  box-shadow: 10px 20px 80px rgba(0,0,0,1);
  transition: all 0.3s cubic-bezier(0.165, 0.84, 0.44, 1);
  transform: translateX(0px);
}

.perspective{
  transition: all 0.3s cubic-bezier(0.165, 0.84, 0.44, 1);
  left: 50%;
  box-shadow: -10px 20px 80px rgba(0,0,0,0.5);
  transform: scale(0.45) rotateY(14deg) rotateX(2deg) rotate(0deg)  translateX(-75%) !important;
}

#lp-pom-text-452, #lp-pom-text-455, #lp-pom-text-456, #lp-pom-text-475, #lp-pom-text-476, #lp-pom-text-477 {
  box-shadow: 10px 20px 80px rgba(0,0,0,0.4);
}
.checkmark__circle {
  stroke-dasharray: 166;
  stroke-dashoffset: 166;
  stroke-width: 2;
  stroke-miterlimit: 10;
  stroke: #7ac142;
  fill: none;
  animation: stroke 0.6s cubic-bezier(0.65, 0, 0.45, 1) forwards;
}

.checkmark {
  width: 56px;
  height: 56px;
  border-radius: 50%;
  display: block;
  stroke-width: 2;
  stroke: #fff;
  stroke-miterlimit: 10;
  margin: 10% auto;
  box-shadow: inset 0px 0px 0px #7ac142;
  animation: fill .4s ease-in-out .4s forwards, scale .3s ease-in-out .9s both;
}

.checkmark__check {
  transform-origin: 50% 50%;
  stroke-dasharray: 48;
  stroke-dashoffset: 48;
  animation: stroke 0.3s cubic-bezier(0.65, 0, 0.45, 1) 0.8s forwards;
}

@keyframes stroke {
  100% {
    stroke-dashoffset: 0;
  }
}
@keyframes scale {
  0%, 100% {
    transform: none;
  }
  50% {
    transform: scale3d(1.1, 1.1, 1);
  }
}
@keyframes fill {
  100% {
    box-shadow: inset 0px 0px 0px 30px #7ac142;
  }
}
</style>
On series completion
Saving the best for last, this implementation allows you to monitor the viewing of several videos, show a live progress bar, and then present a reward/prize/offer when all of the videos have been watched.
This is great if you have a series of videos that you want to encourage people to binge watch Netflix-style, like The Landing Page Sessions, or a set of instructional videos that guide a new customer through a training or onboarding sequence.
Here’s the Javascript
<script async src="https://www.youtube.com/iframe_api"></script>
<script type="text/javascript" src="https://rawgit.com/kimmobrunfeldt/progressbar.js/1.0.0/dist/progressbar.js"></script>
<script>
  var vidsWatched = 0;
  //configure Progress Bar
  var bar = new ProgressBar.Line(progress, {
    strokeWidth: 4,
    easing: 'easeInOut',
    duration: 1400,
    color: '#ffffff',
    trailColor: '#eee',
    trailWidth: 1,
    svgStyle: {width: '100%', height: '100%'},
  	from: {color: '#FFEA82'},
  	to: {color: '#74D16A'},
    text: {
      style: {
        // Text color.
        // Default: same as stroke color (options.color)
        color: '#F6921E',
        position: 'absolute',
        right: '0',
        top: '40px',
        padding: 0,
        margin: 0,
        transform: null,
        fontSize: '24px'
      },
      autoStyleContainer: false
    },
    step: function(state, bar){
      bar.setText(vidsWatched + ' of 3');
      bar.path.setAttribute('stroke', state.color);
    }
  });

 var vid1 = $('.lp-pom-video iframe')[0];
 var vid2 = $('.lp-pom-video iframe')[1];
 var vid3 = $('.lp-pom-video iframe')[2];

 var tag = document.createElement('script');
  tag.id = 'iframe-demo';
  tag.src = 'https://www.youtube.com/iframe_api';
  var firstScriptTag = document.getElementsByTagName('script')[0];
  firstScriptTag.parentNode.insertBefore(tag, firstScriptTag);

  var player1;
  var player2;
  var player3;
  function onYouTubeIframeAPIReady() {
    player1 = new YT.Player(vid1, {
        events: {
          'onStateChange': function(e){
        if (e.data === YT.PlayerState.ENDED) {
          console.log('video done');
          $('#lp-pom-video-483').html('<h1 style="color: #7ac142; left: 321px; top:30px;text-align:center;font-family: Montserrat;font-size:48px;">Done!</h1><svg class="checkmark" xmlns="http://www.w3.org/2000/svg" viewBox="0 0 52 52"><circle class="checkmark__circle" cx="26" cy="26" r="25" fill="none"/><path class="checkmark__check" fill="none" d="M14.1 27.2l7.1 7.2 16.7-16.8"/></svg>');
          vidWatched()
        }
      }
    }
  });
    player2 = new YT.Player(vid2, {
        events: {
          'onStateChange': function(e){
        if (e.data === YT.PlayerState.ENDED) {
          console.log('video done');
          $('#lp-pom-video-485').html('<h1 style="color: #7ac142; left: 321px; top:30px;text-align:center;font-family: Montserrat;font-size:48px;">Done!</h1><svg class="checkmark" xmlns="http://www.w3.org/2000/svg" viewBox="0 0 52 52"><circle class="checkmark__circle" cx="26" cy="26" r="25" fill="none"/><path class="checkmark__check" fill="none" d="M14.1 27.2l7.1 7.2 16.7-16.8"/></svg>');
          vidWatched()
        }
      }
    }
  });
    player3 = new YT.Player(vid3, {
        events: {
          'onStateChange': function(e){
        if (e.data === YT.PlayerState.ENDED) {
          console.log('video done');
          $('#lp-pom-video-487').html('<h1 style="color: #7ac142; left: 321px; top:30px;text-align:center;font-family: Montserrat;font-size:48px;">Done!</h1><svg class="checkmark" xmlns="http://www.w3.org/2000/svg" viewBox="0 0 52 52"><circle class="checkmark__circle" cx="26" cy="26" r="25" fill="none"/><path class="checkmark__check" fill="none" d="M14.1 27.2l7.1 7.2 16.7-16.8"/></svg>');
          vidWatched()
        }
      }
    }
  });
 }

  function vidWatched(){
    vidsWatched++;
    console.log("vid watched:"+vidWatched);
    bar.animate(vidsWatched/3);
    if(vidsWatched == 3){
      window.location.hash = "completed";
    }
  }
</script>
Here’s the CSS
<style>
.wrapper{
  transition: all 0.3s cubic-bezier(0.165, 0.84, 0.44, 1);
  left: 10%;
  perspective: 1000px;
  -webkit-perspective: 1000px;
  perspective-origin: 30% 70%;
}

.item:hover{
  cursor: pointer;
}

.item {
  box-shadow: 10px 20px 80px rgba(0,0,0,1);
  transition: all 0.3s cubic-bezier(0.165, 0.84, 0.44, 1);
  transform: translateX(0px);
}

.perspective{
  transition: all 0.3s cubic-bezier(0.165, 0.84, 0.44, 1);
  left: 50%;
  box-shadow: -10px 20px 80px rgba(0,0,0,0.5);
  transform: scale(0.45) rotateY(14deg) rotateX(2deg) rotate(0deg)  translateX(-75%) !important;
}

#lp-pom-text-452, #lp-pom-text-455, #lp-pom-text-456, #lp-pom-text-475, #lp-pom-text-476, #lp-pom-text-477 {
  box-shadow: 10px 20px 80px rgba(0,0,0,0.4);
}
.checkmark__circle {
  stroke-dasharray: 166;
  stroke-dashoffset: 166;
  stroke-width: 2;
  stroke-miterlimit: 10;
  stroke: #7ac142;
  fill: none;
  animation: stroke 0.6s cubic-bezier(0.65, 0, 0.45, 1) forwards;
}

.checkmark {
  width: 56px;
  height: 56px;
  border-radius: 50%;
  display: block;
  stroke-width: 2;
  stroke: #fff;
  stroke-miterlimit: 10;
  margin: 10% auto;
  box-shadow: inset 0px 0px 0px #7ac142;
  animation: fill .4s ease-in-out .4s forwards, scale .3s ease-in-out .9s both;
}

.checkmark__check {
  transform-origin: 50% 50%;
  stroke-dasharray: 48;
  stroke-dashoffset: 48;
  animation: stroke 0.3s cubic-bezier(0.65, 0, 0.45, 1) 0.8s forwards;
}

@keyframes stroke {
  100% {
    stroke-dashoffset: 0;
  }
}
@keyframes scale {
  0%, 100% {
    transform: none;
  }
  50% {
    transform: scale3d(1.1, 1.1, 1);
  }
}
@keyframes fill {
  100% {
    box-shadow: inset 0px 0px 0px 30px #7ac142;
  }
}
</style>
#5: Choose Your Own Adventure (CYOA) entrance experience
Do you have different target customer segment? At Unbounce we consider agencies and in-house marketing teams to be our ideal target customer archetype.
Given that you most likely have multiple ideal customer types, should they all be getting the same experience? No, of course they shouldn’t. But designing multiple experiences can be difficult. Which is why some experimental experiences can be incredibly eye-opening.
I’m a big fan of the Choose Your Own Adventure (CYOA) approach, and it’s not hard to create a few custom flows for your visitors.
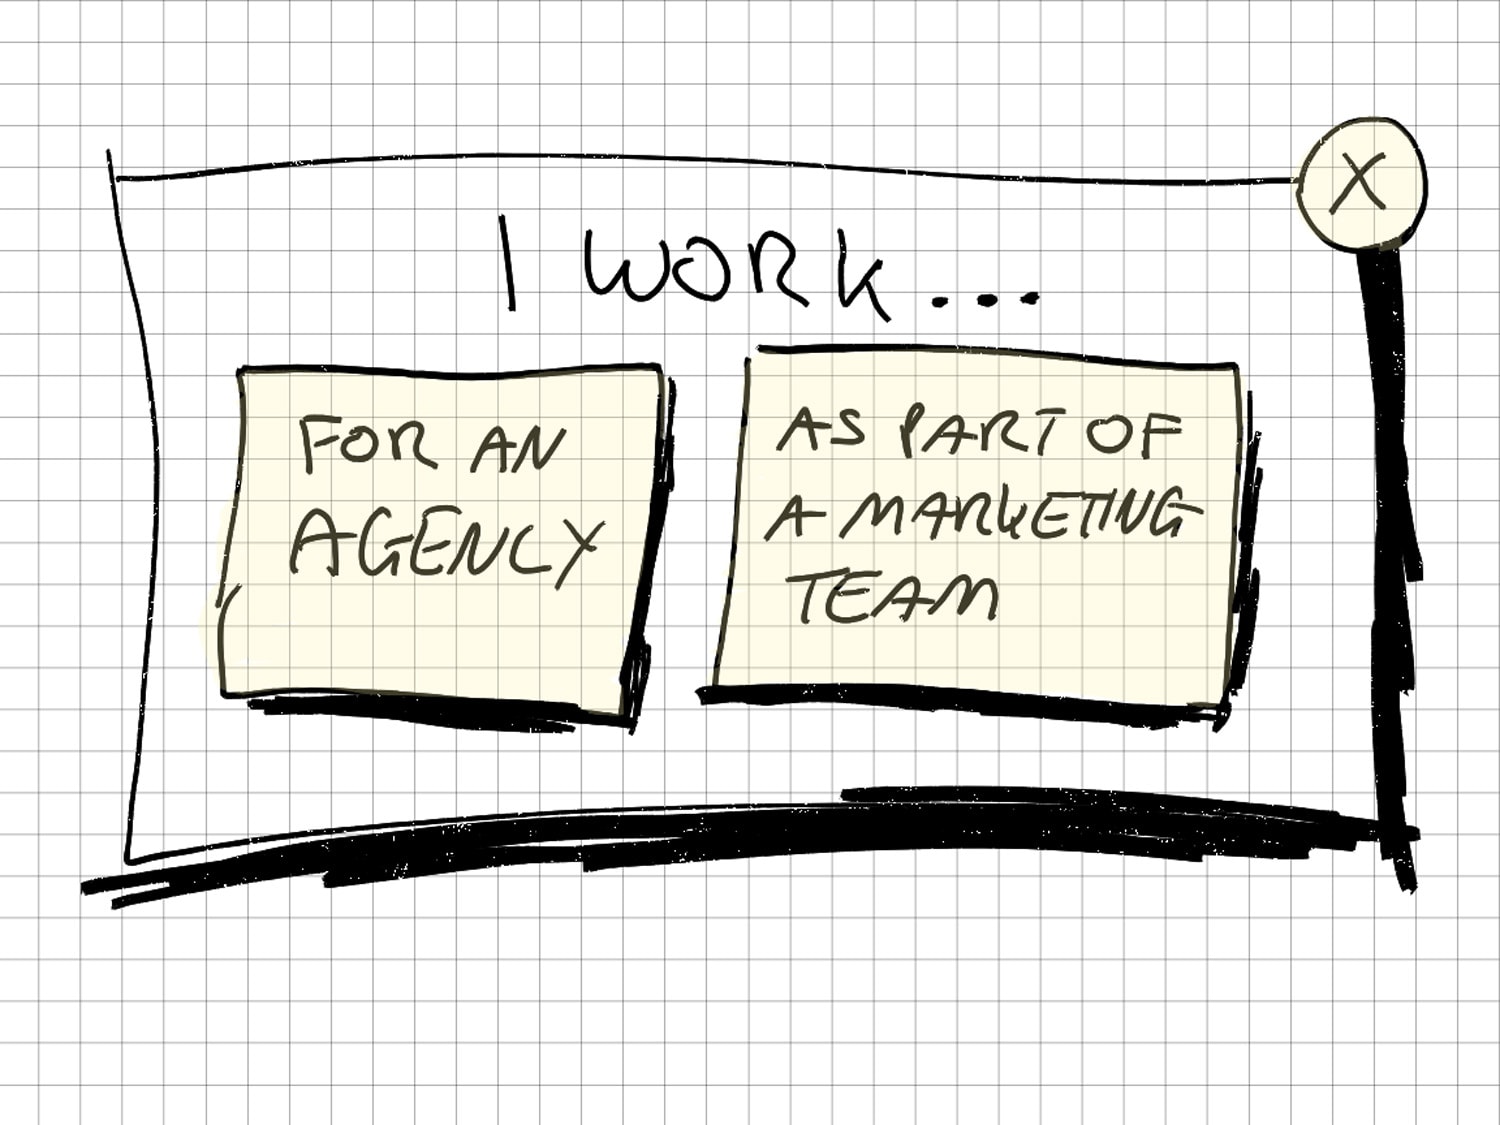
By using an entrance popup with a simple self-identification question, you can drop cookies that help you create more customized experiences in other areas of your website.
I’d start with an “I’m an Agency or Marketing Team” type question.
Once you’ve dropped the cookie(s), you can take that knowledge and create experiences elsewhere on your site (or other web properties), and you can redirect the visitor to the best experience you have on your site for that persona.
For example, if someone self-identifies as working at an agency, you could provide an agency-specific resource or offer if they try to exit your site on the pricing page. For example, “Did you know we offer an agency program that includes a, b, c ?” or “Would you like a demo of Unbounce with one of our agency specialists?
There are almost infinite ways you can leverage this approach just by asking once for people to identify themselves.
And once again, you didn’t have to change anything on your website.
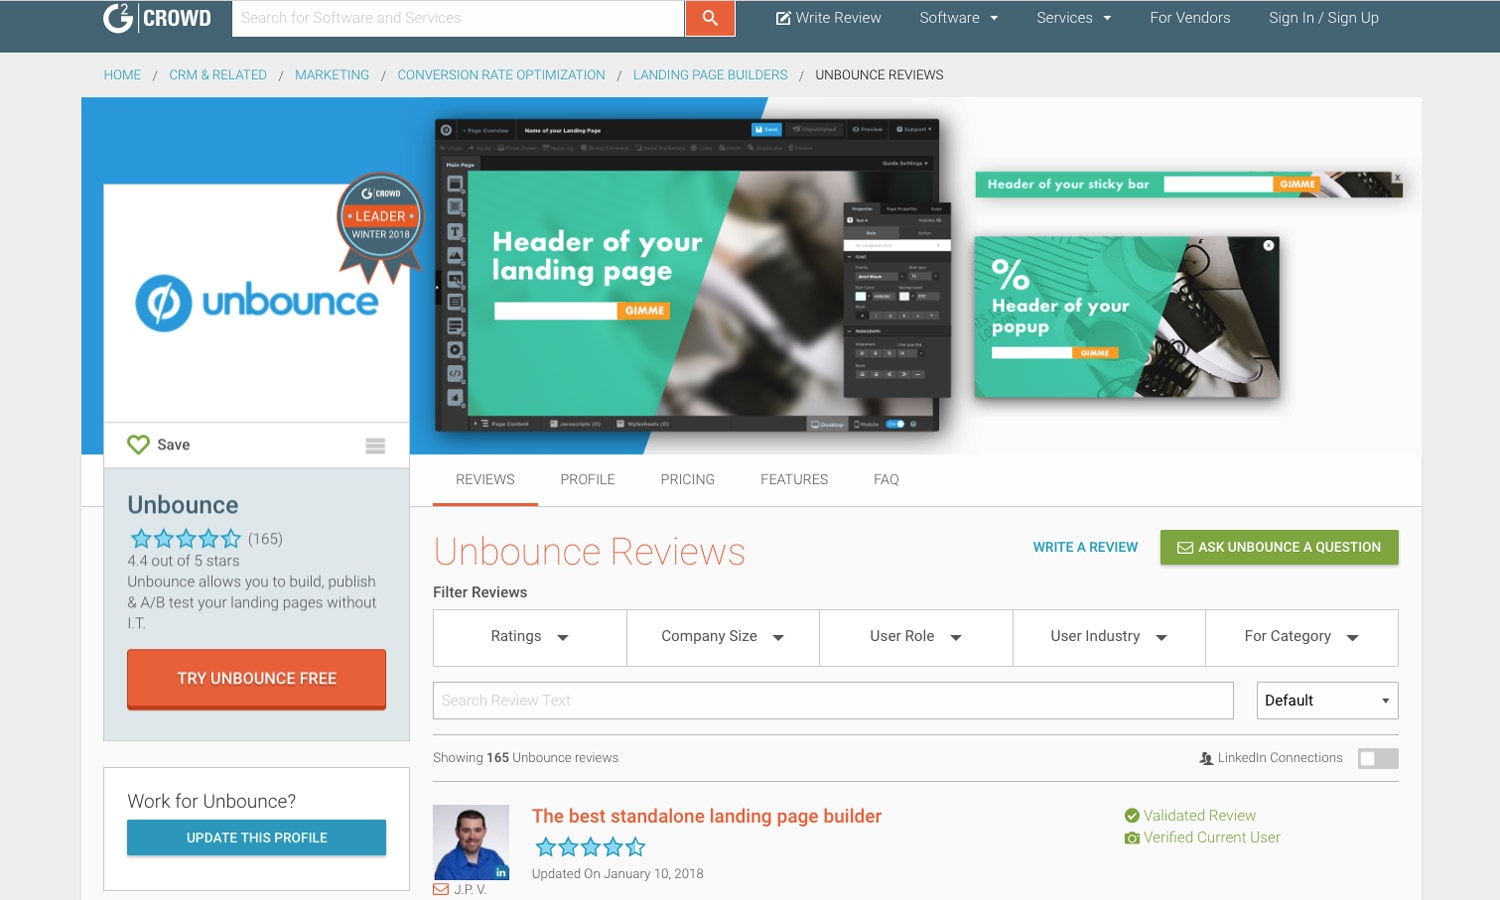
#6: G2 Crowd awareness
Got good reviews on G2 Crowd or Glassdoor? Embed some of the details on an entrance sticky bar for visitors to your “About Us”, “Team”, and “Careers” pages as social proof.
You could take your rating, a badge, or a review to use as social proof.
#7: G2 Crowd reviews
Ask customers (use the cookie you dropped on the login page for the login hijack example) to rate you on G2 Crowd. As you’re dealing with customers and they already do a lot for you, I’d suggest making this a subtle sticky bar and not an in-your-face experience.
#8: Welcome back MVP
If you know what your most important pages are you can use cookies and cookie targeting to drive people to them.
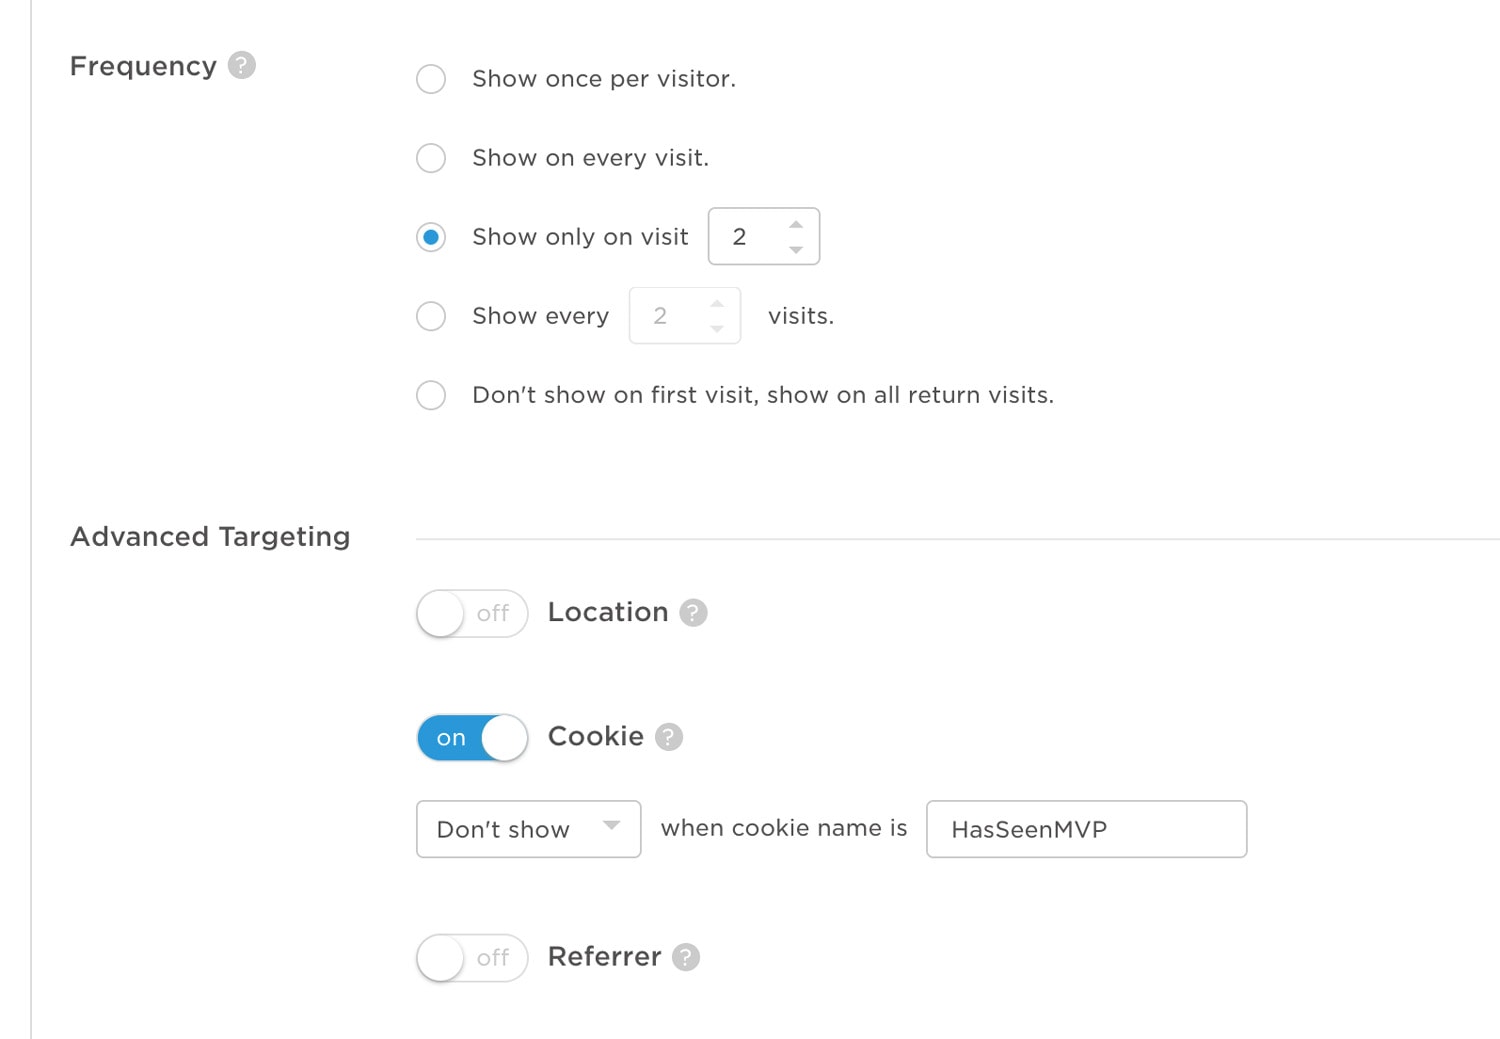
In my Advanced Triggers and Targeting post, I presented the “You Didn’t See My Most Valuable Page (MVP)” concept, where you set a cookie when visitors see your most valuable page(s). That way you can check for the existence of the cookie whenever someone leaves your site, and show them a popup directing them to the important content.
Using a similar approach, you can provide an entrance experience that welcomes them back and drives them to the important content.
To do this you’d combine cookie targeting (doesn’t have the MVP cookie) with a frequency trigger set to second visit. That way you know they are a repeat visitor and haven’t seen the MVP – as opposed to a first time visitor who hasn’t seen it which could mean they are already on their way there.
Create a Google Analytics report that tells you what % of visitors see your MVP, then observe if your Welcome Back MVP influences the number.
#9: Best Blog Content
In tomorrow’s final Product Awareness Month post, I’ll be sharing a lot of lessons I’ve learned over the past 30 days. One of those revolves around the topics of content that you’re writing about, and making sure they are things that people are A) interested in, and most importantly B) searching for.
To help you with this, you can use an exit popup to ask people which content they’d like to see more of. Then use this data (in combination with your SEO research) to guide your writing.
You can embed a simple Typeform in the popup to capture the responses.
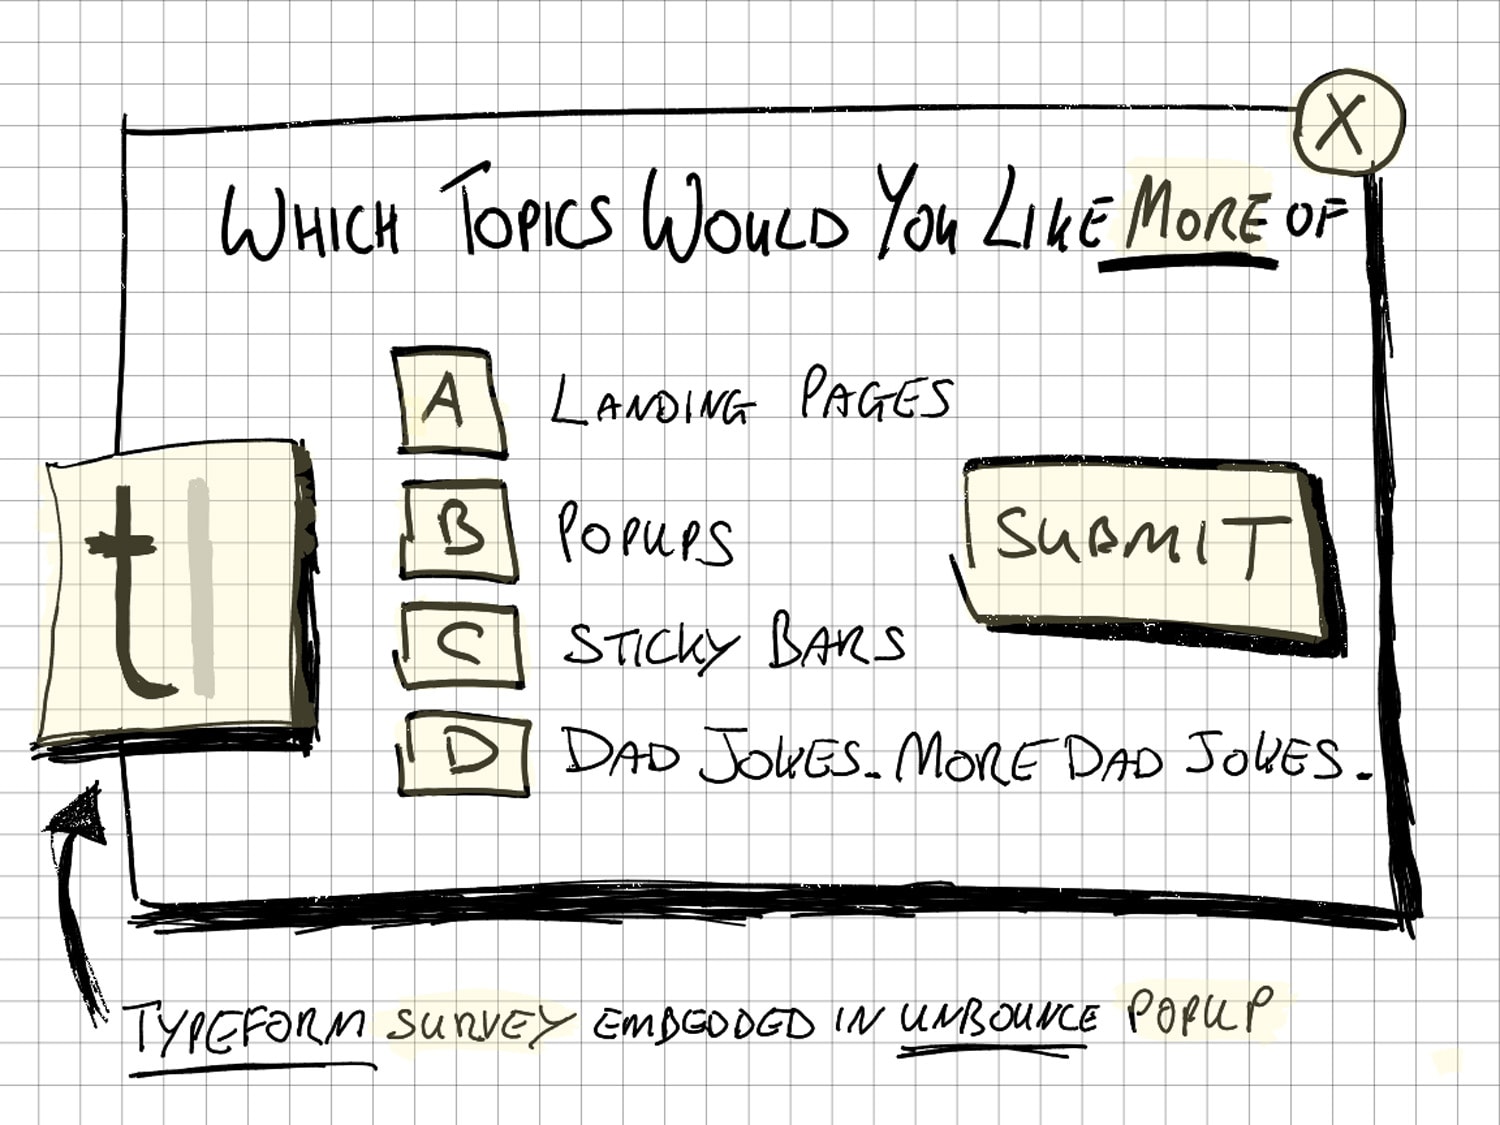
Note: to add a Typeform survey in Unbounce, simple paste the embed code (from Typeform) into a “Custom HTML” element that you drop onto your popup in the Unbounce builder.
#10: Product Awareness Clicker
If you want to collect data about the levels of product awareness you have, at the same time as increasing product awareness, this tip is for you.
While similar in terms of the question to the login hijack, your goal here is to target new visitors as opposed to existing customers.
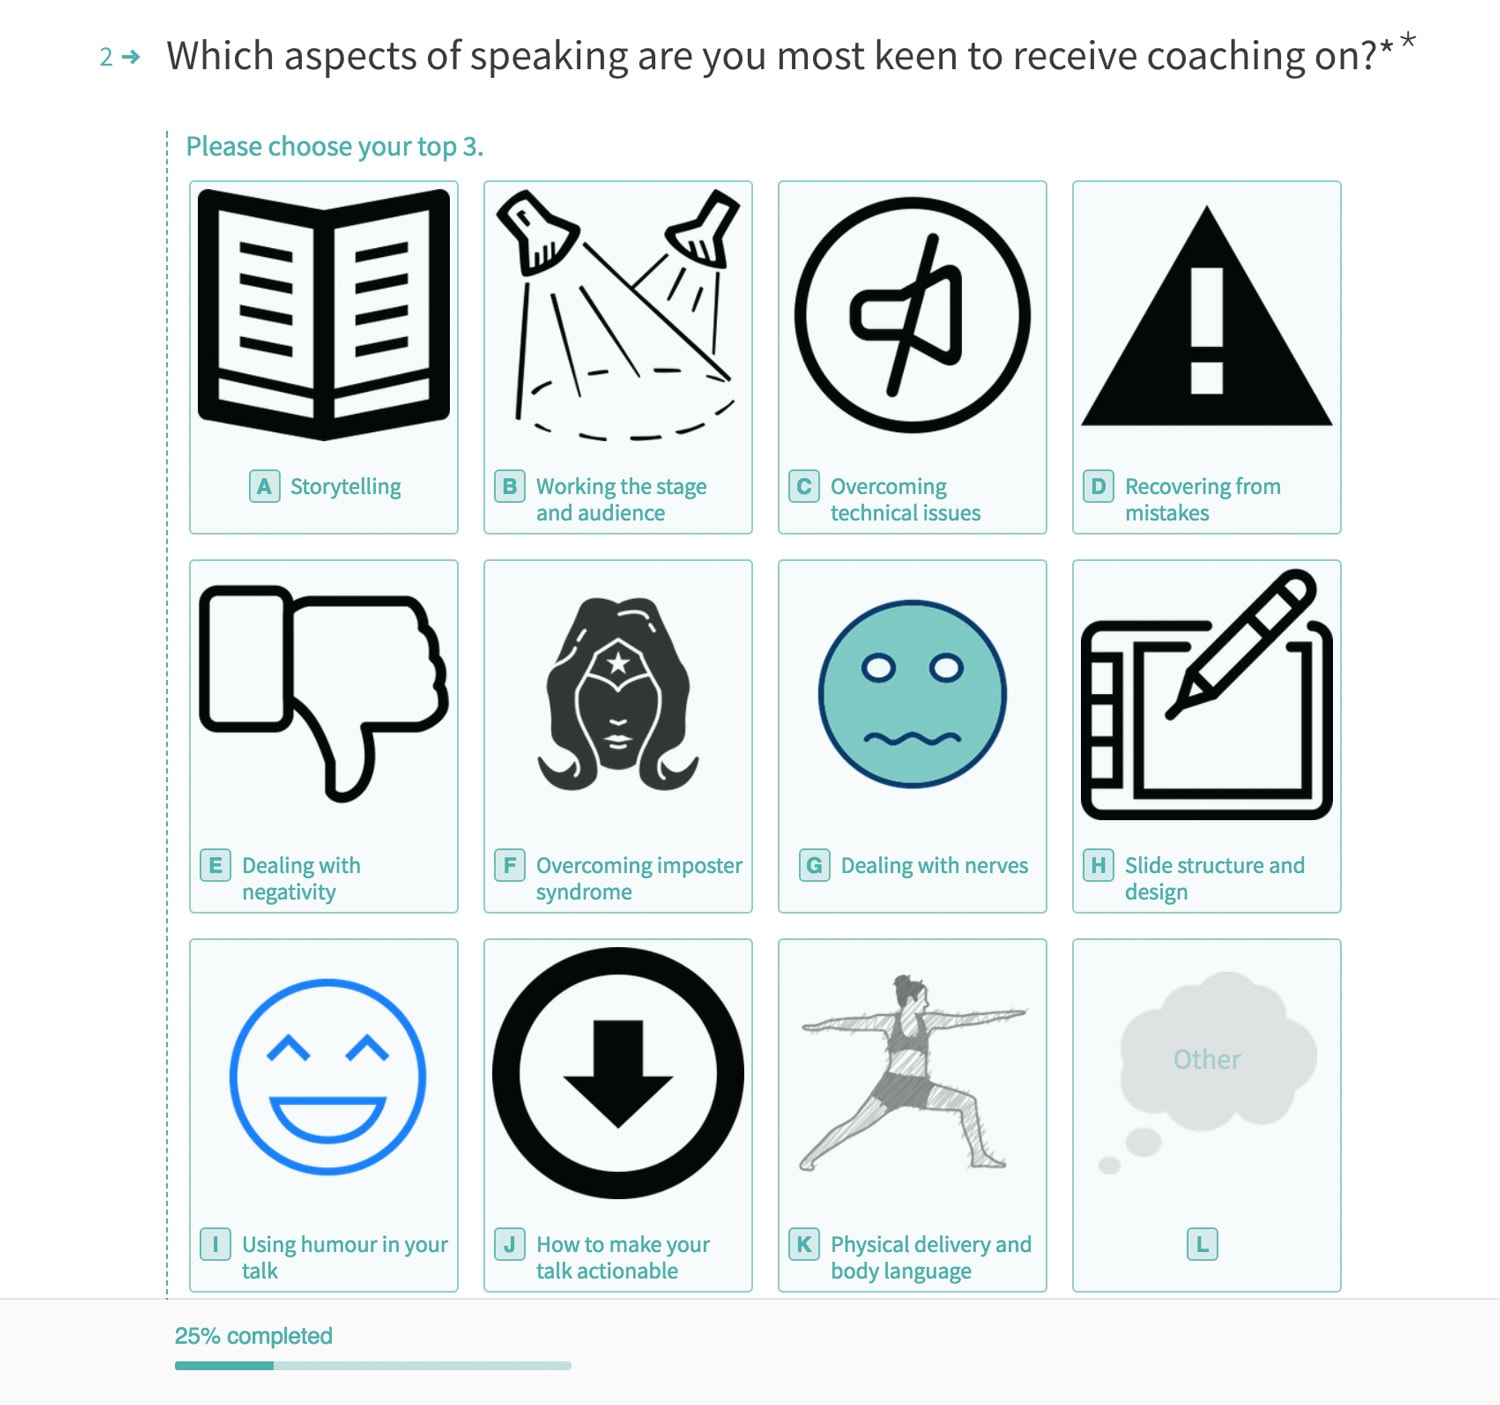
Trigger a popup on your homepage or features page after a time delay, presenting a series of product/feature icons with the request: “Which products/features did you NOT know we provide?”.
To select the appropriate time delay, look at your analytics for the average time on page for the pages you’re targeting, and set it accordingly. You want to set it just below the average so people see it, but still have time to read your content.
You can measure the results with a click heatmap, or by embedding a Typeform survey in the popup like the previous example. I like Typeform because they have some beautiful and simple big-button layouts that are perfect for this concept.
This is a good way to measure movement in your awareness metrics. For more clarity, segment customers from non-customers. You could do this with a second question on the Typeform survey that simple asks are you a customer. Or you could drop a customer cookie on your login or login success page and remove this cohort using the cookie targeting in Unbounce.
#11: Discount on 3rd exit
Just like shopping carts, pricing page abandonment is big deal, but you probably don’t want to give a discount the first time people leave, just because they’re leaving.
But if they repeatedly visit and leave your pricing page, it could be a signal that there’s an issue with them pulling the trigger. It might be the price point, and it might be worth experimenting with a discount using Popup or Sticky Bar.
You should be careful with discounts (if you’re a SaaS business) as they can affect your metrics in negative ways, but there is always a time and a place where it makes sense.
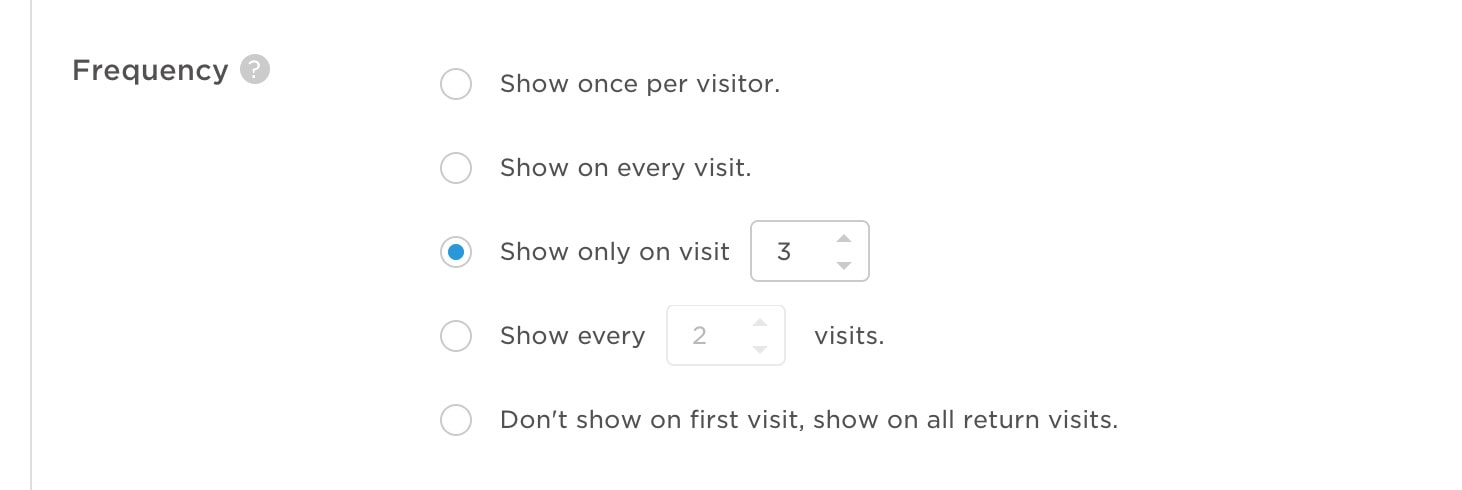
You can choose your own number, but I’d say that the third time someone visits and leaves your pricing page means it’s time to offer either a question (WTF dude?) or an offer/discount.
To do this with Unbounce, just use URL targeting for the pricing page, and show the popup on visit number 3.
So there you have it. A whole bunch of ways you can get into website optimization without bugging your web developer (more than once).
Aaaaand now, tomorrow marks the end of my 30 posts (that became 20) in 30 days product awareness challenge. This will be a transparent deep dive into everything I’ve learned over the course of the month, data from conversions, leads, clicks, adoption, awareness, and every interaction I’m able to consolidate in the next 24 hours.
See you tomorrow. I promise some very interesting learnings and results.
Cheers
Oli Gardner
p.s. Don’t subscribe to “Product Awareness Month”, because it’s over. Instead you should just read the entire epic 20-post collection when you have time for some binge-reading.
