I’ve already talked at length about how to design more delightful popups by using The Delight Equation, and today I want to extend that concept by discussing the triggers and advanced targeting you can use to make popup experiences even better.
I think we’d all agree that showing a popup to your visitors on every visit is a bad idea. We can also agree that generic offers and untargeted messaging is a big turnoff.
That’s where triggers and targeting can make a big difference to the user experience.
Advanced Trigger and Targeting Matrix
Below, I’ve sketched out an interaction matrix leveraging the triggering and targeting features that Unbounce Popups & Sticky Bars can use. I’ve filled in a few ideas, and in the rest of today’s Product Awareness Month post I’ll explain how four of these concepts work, including some live demos because it’s really easy and fun to do with Unbounce.
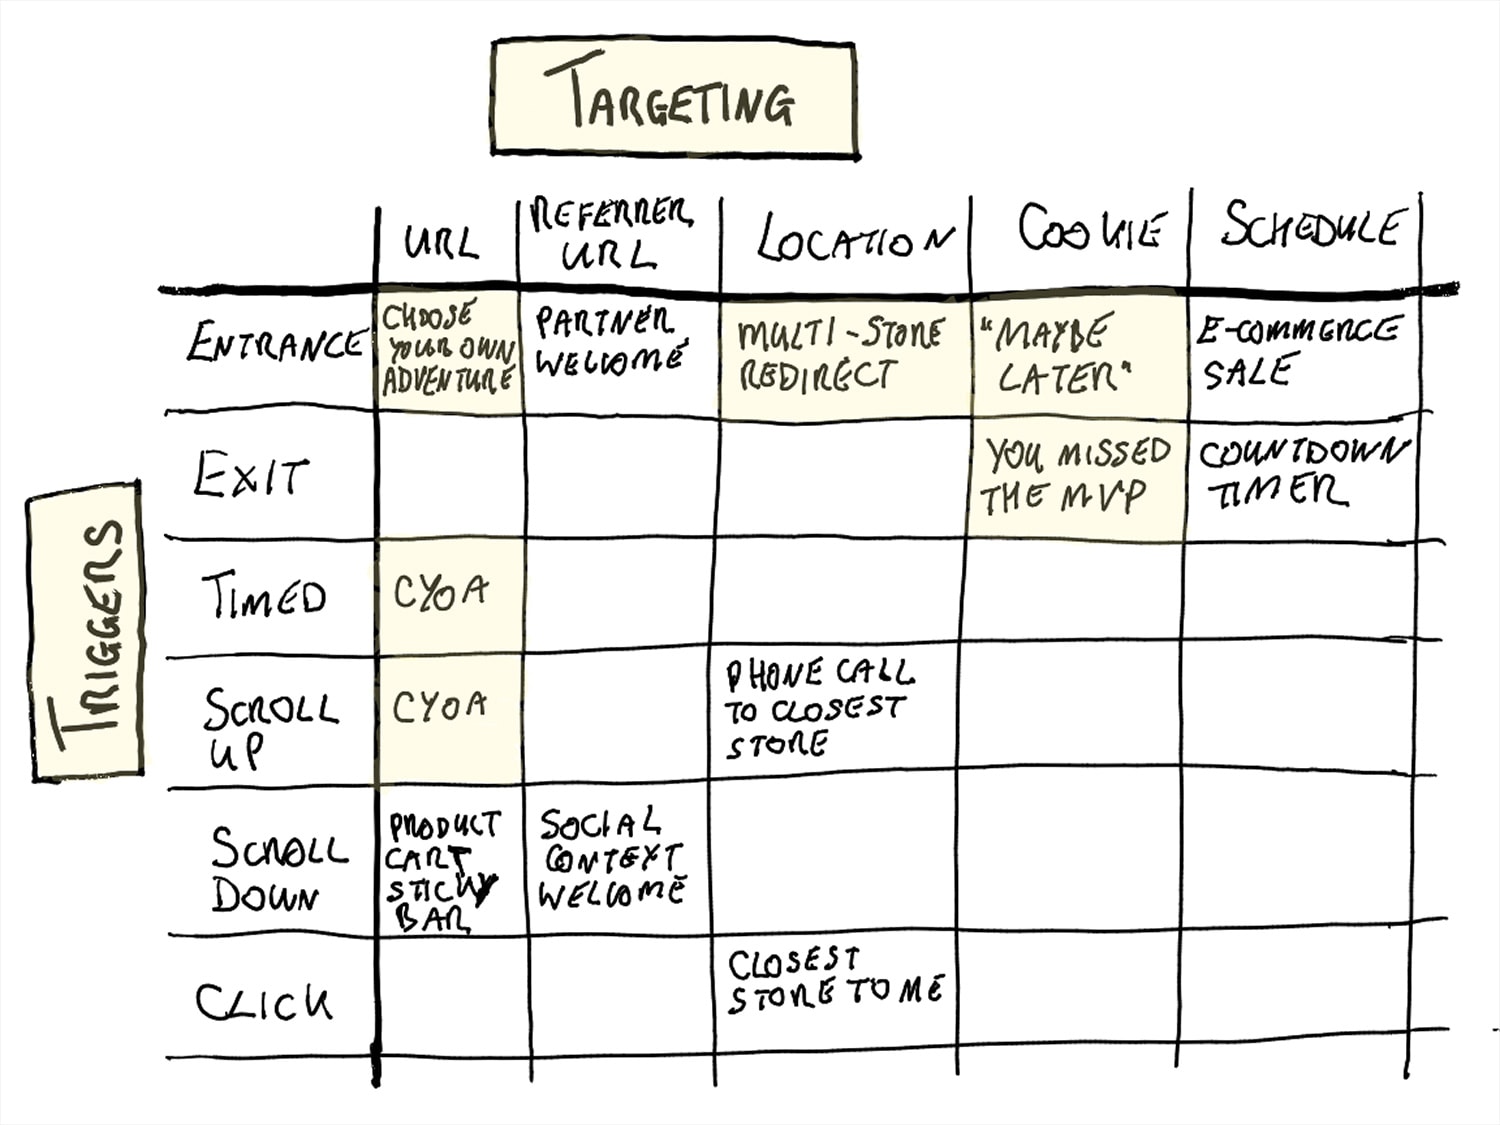
Fair warning. Some of these ideas are a little “out there”. However, I find that being a little ridiculous helps unlock your creativity. And we all need a little more creativity in our marketing.
Use Case #1: Choose Your Own Adventure (CYOA)
Trigger: Entrance, Timed, or Scroll Up
Targeting: URL
This is a great way to learn about the intentions of your visitors.
We’ve been running experiments on our “What is a Landing Page?” page to figure out what people want to do when they arrive. interesting. On that page, I asked the question “What are your landing page needs?” providing three options (each with their own next step CTA):
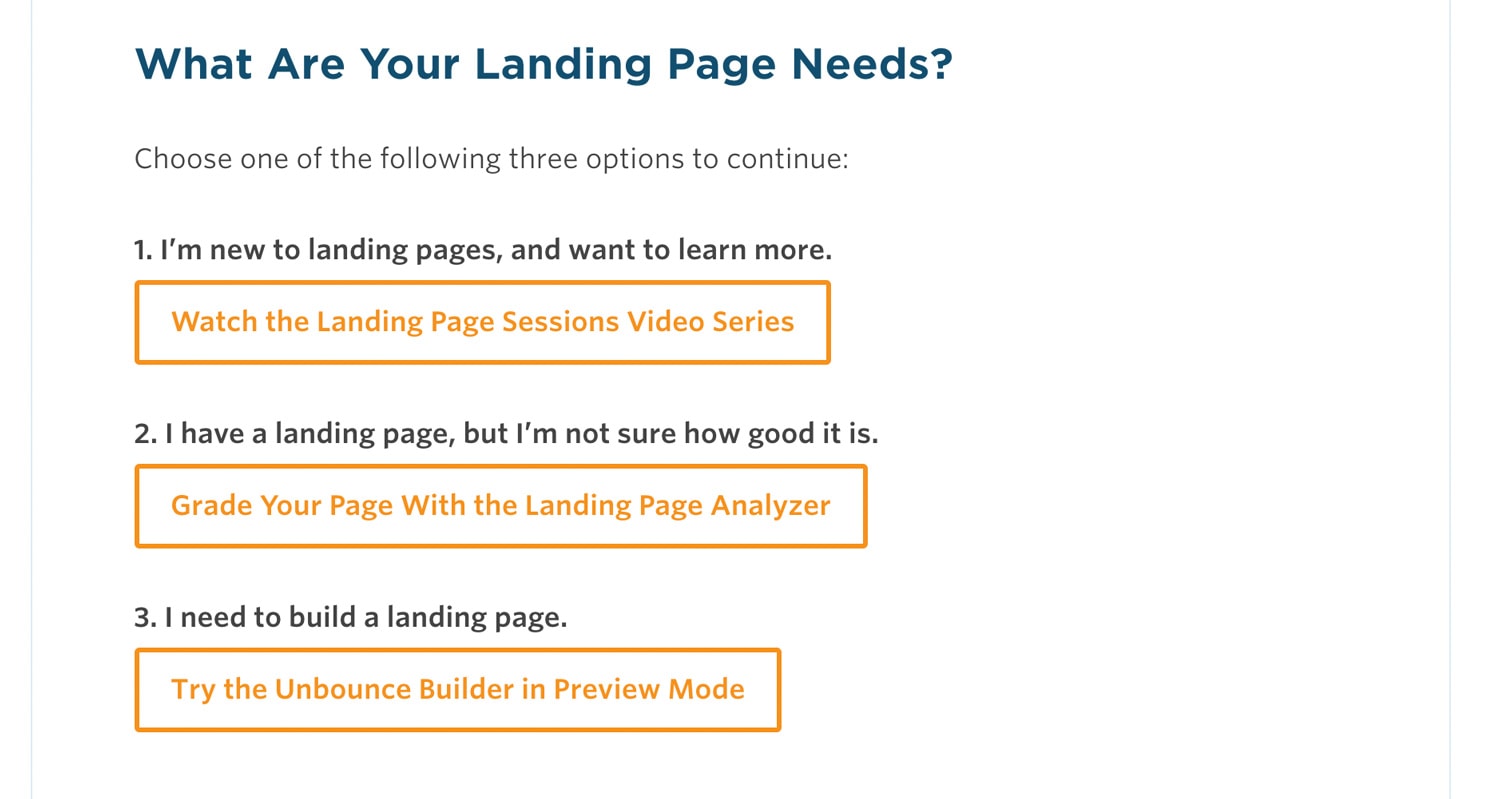
I’ll be sharing complete results from this experiment at the end of the month.
CYOA Demos
Pro Tip: You can attach a parameter to a URL (?ttdemo1 for instance) which lets you use URL targeting to only show the popup in that instance. Because I want to keep you on this page, I’m just going to provide three links that reload this page, but with individual URL parameters.
- Entrance trigger demo
with URL parameter targeting ?ttdemo1 - Scroll Up trigger demo
with URL parameter targeting ?ttdemo2 - Time Delay trigger demo
with URL parameter targeting ?ttdemo3
To set this up, I simply duplicated the first popup twice, and set the URL targeting and trigger options appropriately.

What’s even cooler is that because I used the URL targeting for any unbounce.com URL that contains ?ttdemo1, the experience can be shown to anyone, via any link, just by appending the URL parameter. Like this link to our homepage. #mindblownmuch?

Scroll Up and Time Delay are good triggers to use to capture the attention of people who may not have found what they’re looking for. Like U2. Scroll Up is great for mobile as it’s a little bit like an exit signal on desktop.
Make sure you track these pathways in Google Analytics and stick a heat map on the page (I use Hotjar) so you can get a simple visual of where people are clicking. This is one of the original click maps for “What is a Landing Page?”.
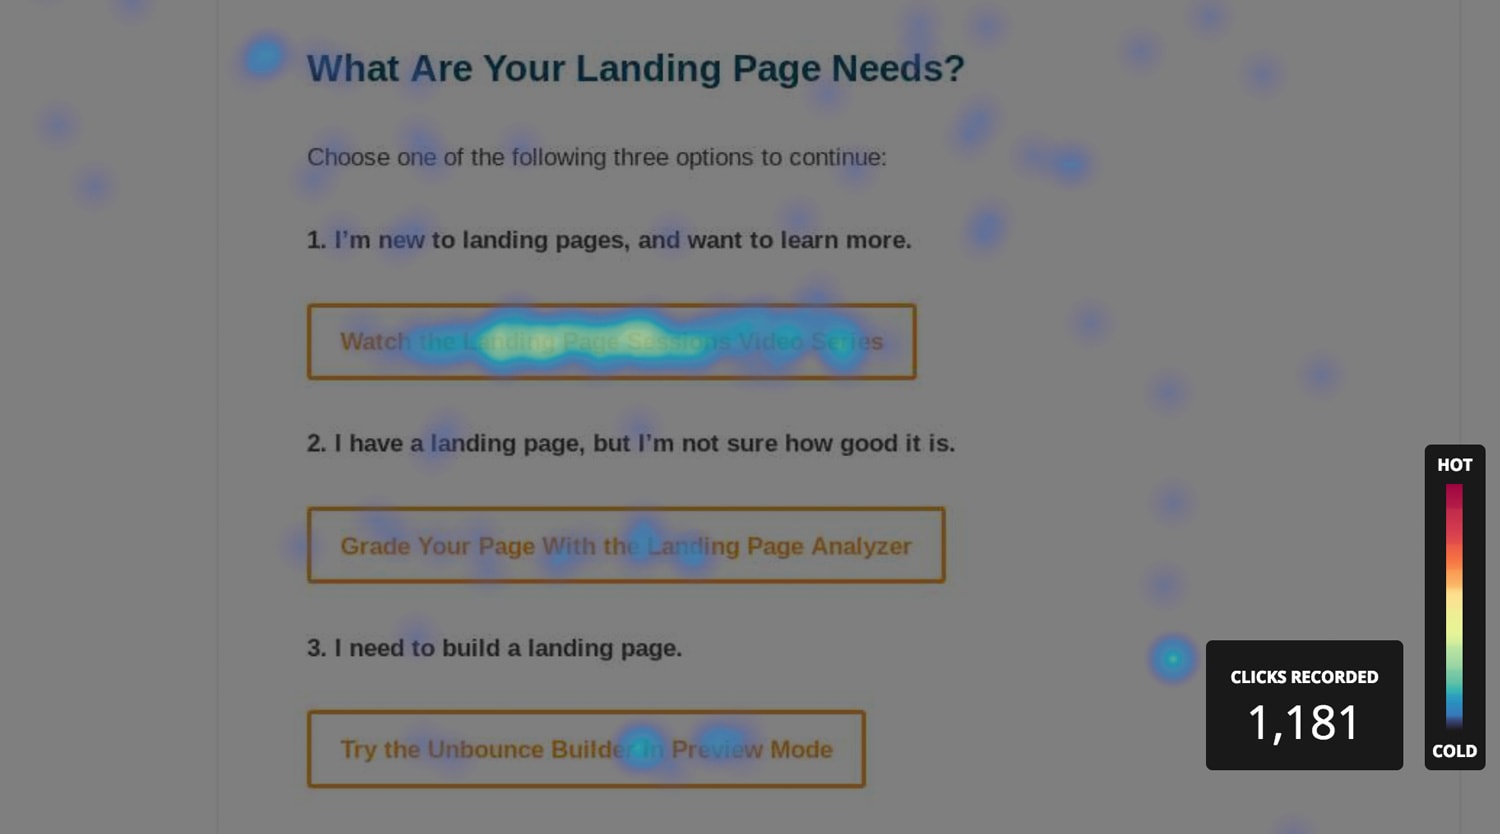
Once you’ve learned something about your visitors’ needs you can start making changes to the page to reflect that. I’ll be digging into a concept I’m calling “No-Touch CRO” next week, which has more examples of how you can use Popups and Sticky Bars to learn about your visitors without having to change your site.
Use Case #2: You Didn’t See My Most Valuable Page (MVP)
Trigger: Exit
Targeting: Cookie
Every website has pages that we consider critical to the conversion experience. For you, it might be the features page, the pricing page, or the homepage. It could even be a blog post that’s particularly good at convincing people to sign up.
How dare someone come to your site without visiting your favorite pages! Let’s be realistic though, not everyone has the time, inclination, motivation, or easily identifiable path to get to where you want them to go.
I’m calling this use case “You didn’t see my MVP!” – as it’s designed to at least make sure they’re given an opportunity to see your magic content.
This is how it works:
- Drop a cookie on your most valueable page (MVP).
- Set up a Popup or Sticky Bar to fire on exit when the MVP cookie is NOT present.
Pretty simple right?
MVP Demo **Desktop Only**
Follow these instructions to see a demo. It’s desktop only because you can trigger an exit popup on a phone.
- Click here
To reload this page adding a URL parameter ?ttdemomvp. - Trigger the exit popup
Move your mouse out of the browser as if you are going to close it. - Click the button on the popup to visit the MVP page
The cookie will be set on that page. - Click the back button to return to this page
- Refresh this page and try to trigger the exit popup
Now that the cookie has been set the popup won’t fire, as we’ve already seen your high-converting content.
Use Case #3: Maybe Later
Trigger: Entrance + Click
Targeting: URL + Cookie
“Maybe Later” is one of my favorite concepts to come out of this month’s exploration. You can read the full post about it here, and I’ll provide the elevator pitch below.
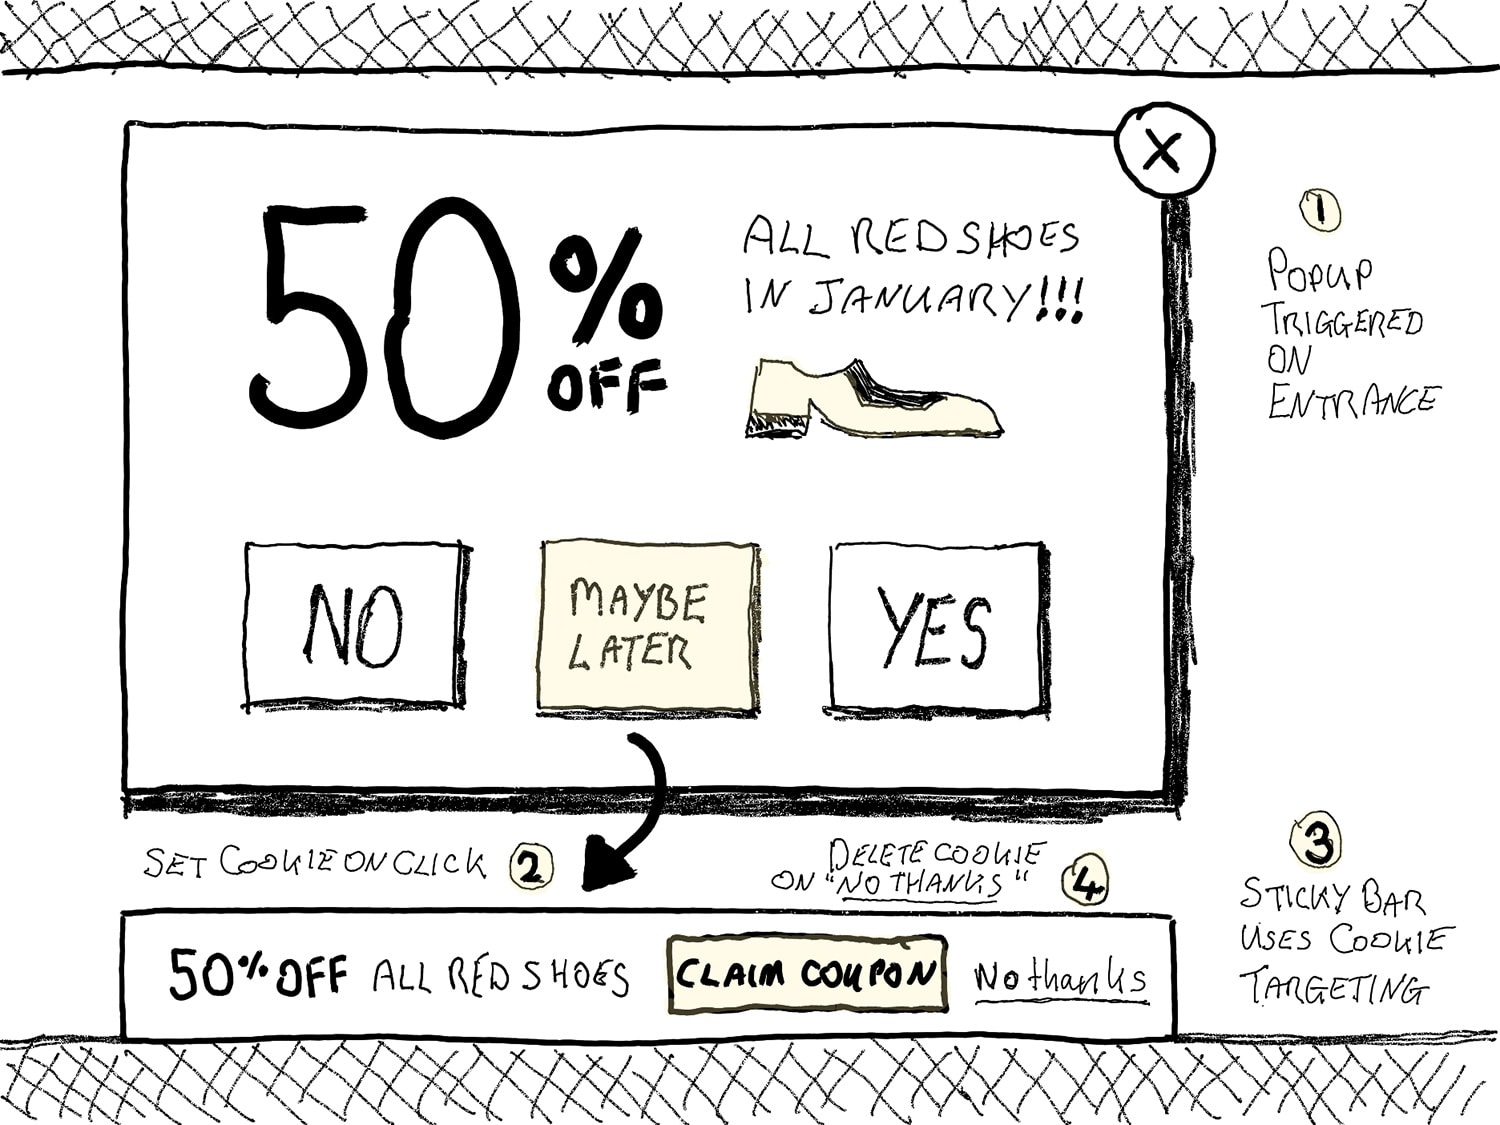
“Maybe Later” is a Solution to Increase Engagement and Reduce Frustration
As you can see in the sketch above, instead of the now classic YES/NO popup “Maybe Later” includes a third option called, you guessed it, “Maybe Later”.
It’s more than just a third button, here’s how it works:
- The popup appears when you enter the site. You can choose “No” to get rid of it, “Yes” to take advantage of it, or “Maybe Later” to register your interest but get it out of your way.
- When you click “Maybe Later” a cookie is set to log your interest.
- Now while you are browsing the rest of the site, a Sticky Bar – targeted at the cookie that was set – appears at the bottom (or top) of the page, with a more subtle reminder of the offer, so that you know it there and ready if you decide to take advantage of it.
- If you decide against the offer, you can click “No thanks” on the Sticky Bar, the cookie is deleted, and the offer is hidden for good.
The core purpose of this idea is to put the control back with the shopper while creating an effective method for the retailer to engage with you, with your permission.
“Maybe Later” Demo
Follow these instructions and you’ll see “Maybe Later” in action:
Please note: the demo is desktop only right now.
- Visit this page (opens in new window).
- Click the “Maybe Later” button and the popup will close.
- Refresh that page and you’ll see a Sticky Bar with the same offer appear at the bottom.
- Come back to this page.
- Refresh this page and you’ll see the Sticky Bar here too.
- Click “No thanks” to get rid of it when you’ve had enough :D
Use Case #4: Location Redirect
Trigger: Entrance
Targeting: URL + Location
It’s common for e-commerce businesses to have localized websites like amazon.com/amazon.ca/amazon.co.uk etc. But sometimes you need to redirect people to the correct country because the link they clicked is coming from an affiliate (or other) that’s only pointing to the US domain.
The simplest way to handle this scenario is to create a popup that combines an entrance trigger with URL and Geo Location targeting.
You can then target a “We have a Canadian Store, Eh! Wanna go there instead?” message on the U.S. site to visitors who’s location is in Canada.
I created two popups. One to be shown to Canadians, and one to the rest of the world using the location targeting settings.
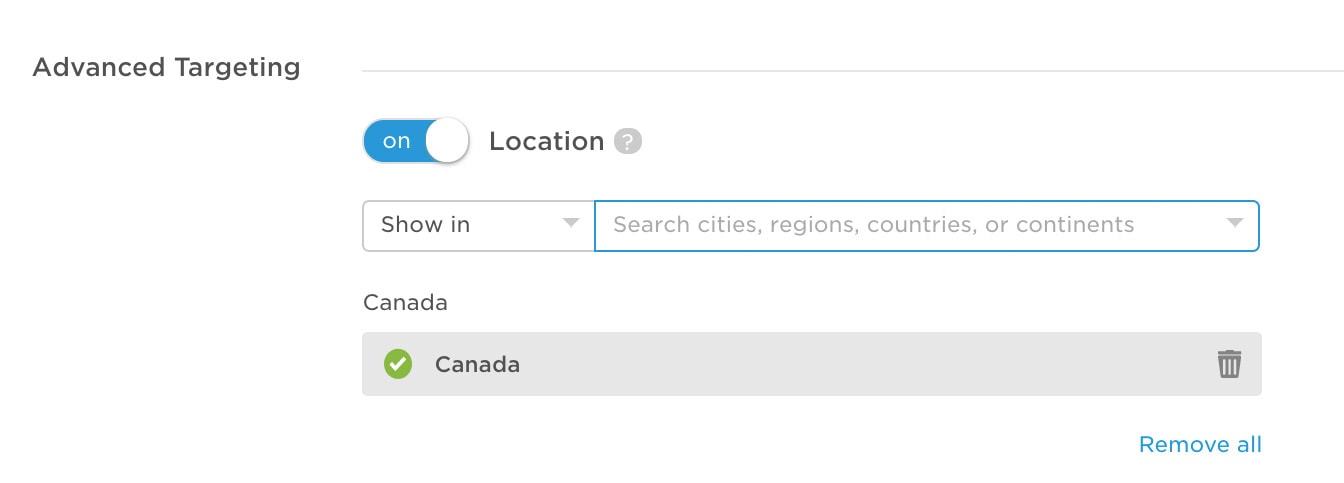
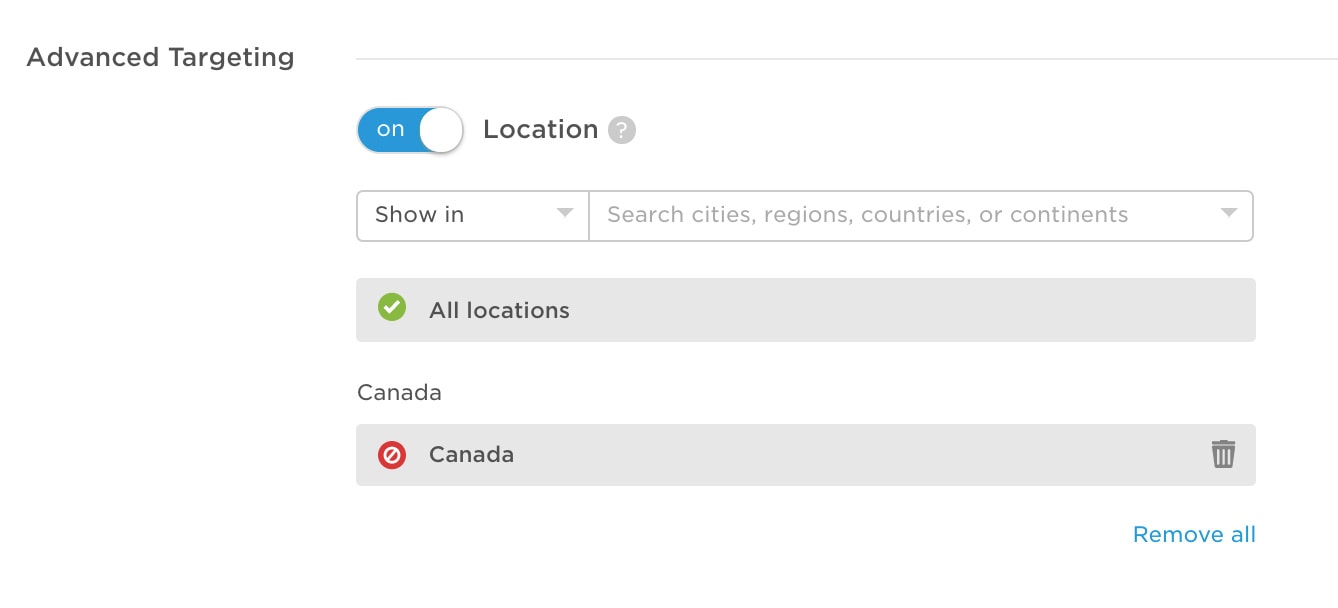
Click here to see the popup. If you’re in Canada you’ll see a redirect popup, and if you’re anywhere else you’ll see a “Continue to the U.S. store” popup.
And here’s a video of me VPN’ing to New York to show how the popup changes.
There are so many ways you can combine triggers, targeting, and frequency to create popup experiences that treat your visitors with relevance and respect. If you have any cool combos that you’re using, please chuck ’em into the comments so we can discuss how they work.
Cheers
Oli
p.s. Don’t forget to give the 14-day trial of Unbounce a go. You get landing pages, popups, and sticky bars all included in your plan.
