When’s the last time you felt special?
Go ahead… close your eyes and visualize the last time your boss called you out in a group to recognize your excellent performance. Or the last time your grandmother mailed you a special batch of your favorite cookies.
Now, imagine being able to replicate that feeling for your audience with a marketing campaign.
Problem is, one-to-many communication is difficult.
And while you may not be able to give people the exact same feeling they get from a special delivery of grandma’s cookies, showing empathy and delivering personalized messages really can make prospects feel like you understand them. (And that can have a positive impact on your campaign’s KPIs.)
But you need to be willing to go further than just calling them out by name…
Unbounce’s recent pricing update campaign
In March 2017, Unbounce launched a campaign to roll out our new pricing plans. We knew pricing plan updates were a sensitive subject, so we wanted to go above and beyond to explain exactly how our new pricing plans would be delivering more value to our customers.
We injected a bit of humor and a whole lotta personalization into the campaign:
We learned a lot along the way, and we want to share step-by-step instructions for three of the most effective tactics we used to created ultra-personalized messages for an audience of 10K+ Unbounce customers:
- A custom image delivered as part of an email series (which boosted email click-through rates)
- Hyper-customized landing pages with Dynamic Text Replacement to ensure that our messaging was tailored to every cohort we targeted with our campaign
- A prompt for customers to set a personalized calendar reminder for the date the deal was set to expire
Let’s put all that data you’re collecting on leads to good use, shall we?
Idea #1: Create a custom image and boost email click-throughs
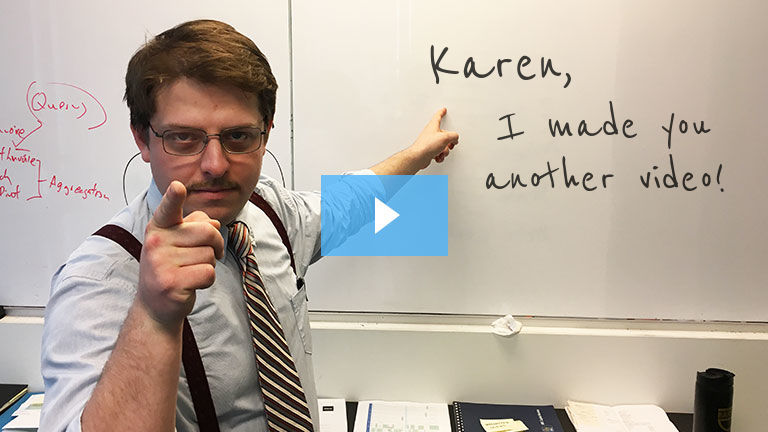
As they say, the most-loved word in any language is your own name. For our campaign, we experimented with sending an email that contained an image thumbnail customized with the reader’s first name:
We hypothesized that this would result in an increase in email click-through rate.
How’d it perform?
Before we rolled out the personalized thumbnail in our own campaign, we did a small batch test to validate our hypothesis that a personalized image could increase click-through rates. Here’s how it played out:
| Generic thumbnail | Personalized thumbnail | |
| Click-through rate on open* | 9.5% | 14.6% |
*Click-through rate on open shows: of the recipients who opened the email, how many clicked.
While a five percent difference may not seem like anything to write home about, that’s a relative difference of 52%. Using a personalized thumbnail helped us reach our conversion goal and it even spurred replies like this:

I thought you’d never ask!
How to personalize a video thumbnail image
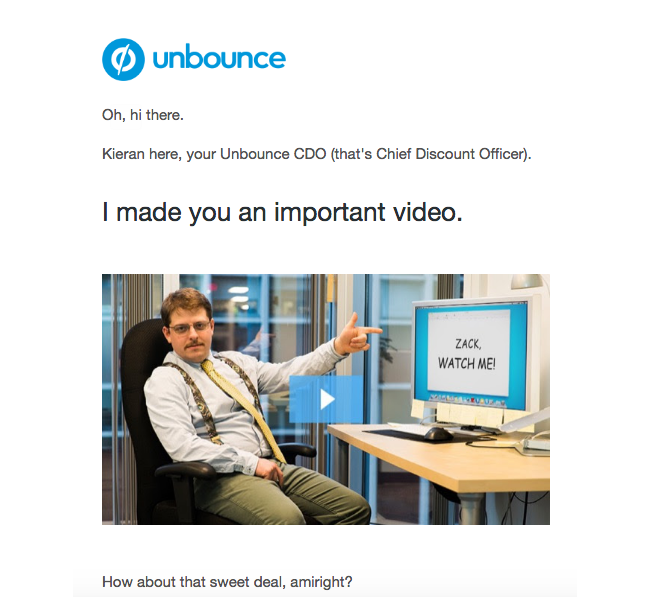
First, we built the base image (the picture of Kieran above) and edited the image in Photoshop to add the text.
Next, we uploaded the image to a third-party tool called Cloudinary, which performed all the heavy lifting of customizing an image for 10K+ readers: Cloudinary stored the base image and changed out the text for each individual name.
You can get into all the nitty gritty details of their cloud image manipulation by reading Cloudinary’s documentation, but here is an overall explanation of what we did:
- Uploaded the base image to Cloudinary
- Added a generic text popup with the message and “name” as a placeholder
- After adjusting the positioning, fonts and color of the text popup, we copied the URL of the image
- Using Intercom as our primary email communication tool with customers, we added an HTML element to the email to add the image (using the HTML element is key because you need to be able to edit the image URL)
- Replaced the “name” placeholder on the image URL with Intercom’s personalization token (and a fallback)
- Tested (and retested) the email and image to make sure it worked on every email and browser
- Minds were blown. We celebrated! 🎉
Idea #2: Personalize your landing pages with Dynamic Text Replacement
Now that we had secured a healthy click-through rate on our emails, we wanted to ensure that the post-click experience was just as delightful for customers.
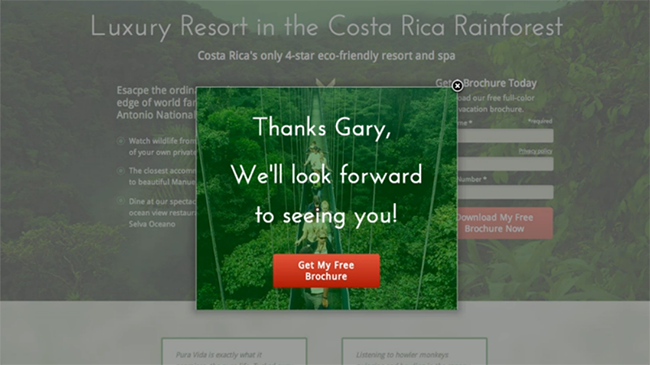
To match our hyper-personalized emails (left), we created a single landing page for each cohort in the campaign, personalized with the reader’s name and plan type (right):
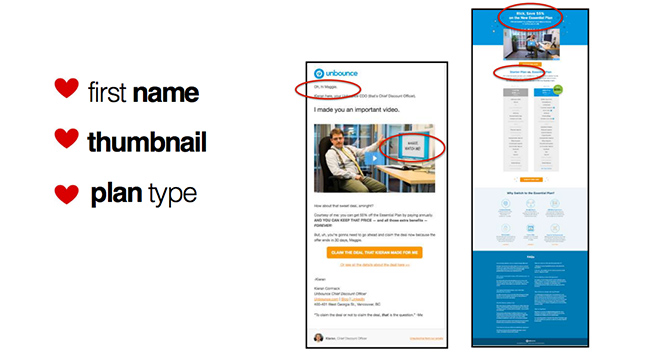
We also included this customized image in the footer of the page, for customers who needed extra help and wanted to speak to support:

How’d you do that?
Dynamic Text Replacement (DTR) is an Unbounce feature that allows you to swap out landing page copy to be super relevant to readers.
The power of DTR is in its ability to help you create flawless message match between your emails and corresponding landing pages. Strong message match increases conversions because it reassures people they’ve come to the right place.
We hypothesized that personalizing the landing page with the customer’s name would let visitors know that they made a “good click” — and by seeing their own name throughout the page, visitors would stay long enough to read through the new plan details.
How to Use Dynamic Text Replacement
The first step is to ready your landing page for Dynamic Text Replacement so you can sub in your prospect’s name (or other piece of personal information):
Next, you’ll want to generate a URL that will pass parameters (e.g., first_name) from your email to your landing page using DTR.
Use the following format to make the URL that you’d like to link to:
[landing page URL]?[parameter]=[value]
For example, your link might look as follows (where *|FNAME|* is the first name merge field in MailChimp):
http://www.yourcampaignURL.com/?name=*|FNAME|*
Once you’ve generated that link, you can hyperlink it from your email’s call to action button. Now, your prospects will receive an email with their name, click through the CTA and land on a landing page that also calls ’em by name. Beauty, eh?
Sometimes we’re so focused on getting the lead that we forget about what happens next. The thank you page or confirmation dialogue box that appears after a visitor converts is all part of the experience.Use DTR to personalize your form confirmation — it’s a simple tactic, but it adds a whole lotta delight.So instead of this:
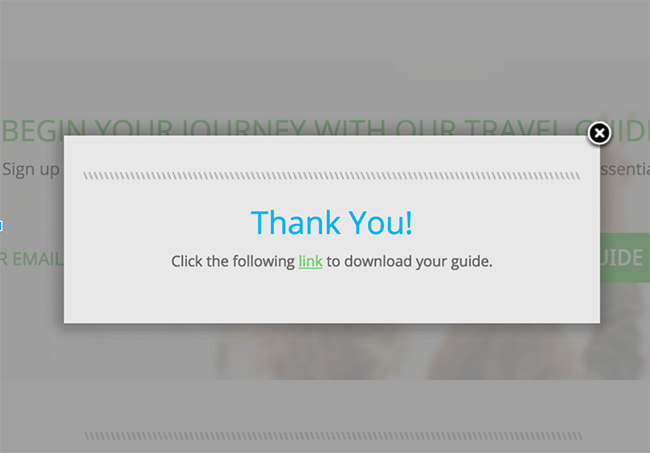
Your visitors will see a customized form confirmation message, like this:
Idea #3: Help users set a personalized reminder
What if your reader is interested in your offer but they’re not quite ready to take you up on it? Don’t let them bounce and completely forget about it!
In our campaign, we offered abandoning visitors the chance to set a calendar reminder the week before their deal expired with the help of an on-exit popup and a tool called AddEvent:
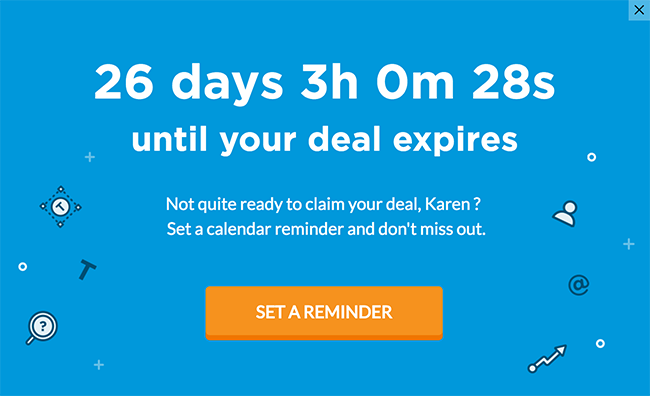
The popup prompted the visitor to create a personalized reminder directly in their calendar tool of choice. Customers who set this up would receive a reminder a week before their custom deal was to expire.
(Bonus: this allowed our team to better forecast when a bunch of conversions were about to roll in.)
How to prompt visitors to remember your offer
Once you’ve created an AddEvent account, setting it up in Unbounce is as easy as one, two, three:
- Grab their Universal Script and add to your landing page or popup.
- Set the desired time zone by selecting the country/region where the event is located
- Customize any other AddEvent parameters and add the final code snippet to wherever you want the button to appear.
")
Is it delightful? Or just creepy?
Like anything else you implement on your page, you’re going to want to thoroughly test these tactics to see what effect (if any) they have on your conversion rates. (Better safe than sorry!)
And remember to keep your personalization tactics in check… the goal is to delight the customer, not creep them out!
Over to you: How do you personalize your campaigns? Let us know in the comments!
